
Creating your own custom blank map
THIS TUTORIAL IS UNDER CONSTRUCTION
For this tutorial you DO NOT need Taliis or any other outdated software! Please use the software specified in the tutorial. Pictures from Taliis are just an imaginary explanation of how the WDT grid looks like.
If you have read all the previous parts of our beginner’s tutorial, you are probably able to perform almost all the basic operations on World of Warcraft maps. In this part of the tutorial, you will learn how to create new blank custom map for your builds, expand it and join different maps together. First of all, you should get a basic understanding of how maps are handled in WoW client. Every map basically consists of .adt files, one .wdt file, one .wdl file and an entry in "Map.dbc". Now, we will explain what each file type is responsible for:
- .ADT file is the most important element of ever map’s structure. It contains heightmap, texture, model and many other kinds of information. That’s the files Noggit is mostly aimed to edit.
- .WDT file keeps all information about the position of every .adt file on your map, the quantity of used .adt files and some other things. Every map has only one .wdt file.
- .WDL contains some heightmap and model information which is used by the game client for rendering far away mountains, models. This file also also allows Noggit to display your map contours on the map preview. There is only one .wdl file per each map. This file is optional and a map will get loaded even without it.
So, let’s get started and create your first custom map.
Step 1. Generating .adt files
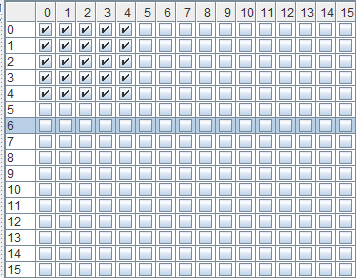
First of all, you should decide on the size of your map. I will use 5 x 5 map as an example. This is basically how the .adt array in .wdt files looks like.

So, now imagine that we want a map of 5 x 5 .adt files in size.
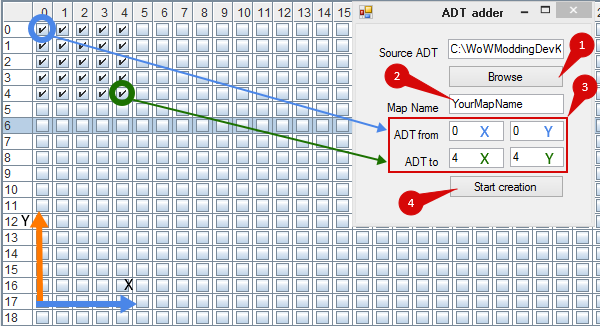
Launch AdtAdder.exe tool which can be found in your WoWDevKit in the Tools folder.
- Select a source .adt from your ADTAdder folder. The file is named “Template_0_0.adt”
- Enter your map name. This is how your files will be named, it does not affect anything much.
- Fill in the coords that are demonstrated on the picture below. Everything is quite clearly explained there by arrows and other pointers.
- Press “Start creation” button and wait until the tool creates your files.
Step 2. Moving your .adts and generating .wdt files
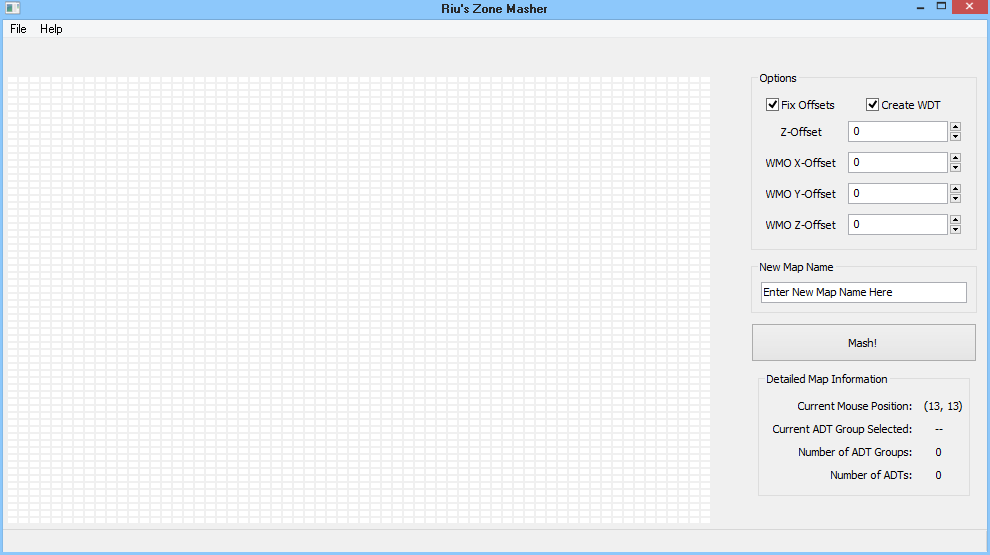
Now you have your map files, but the client is not able to read them because there are still no .wdt file. In order to create it, open a tool called “Riu’s zone masher” in your “Tools” folder. Once opened, you will see this window.
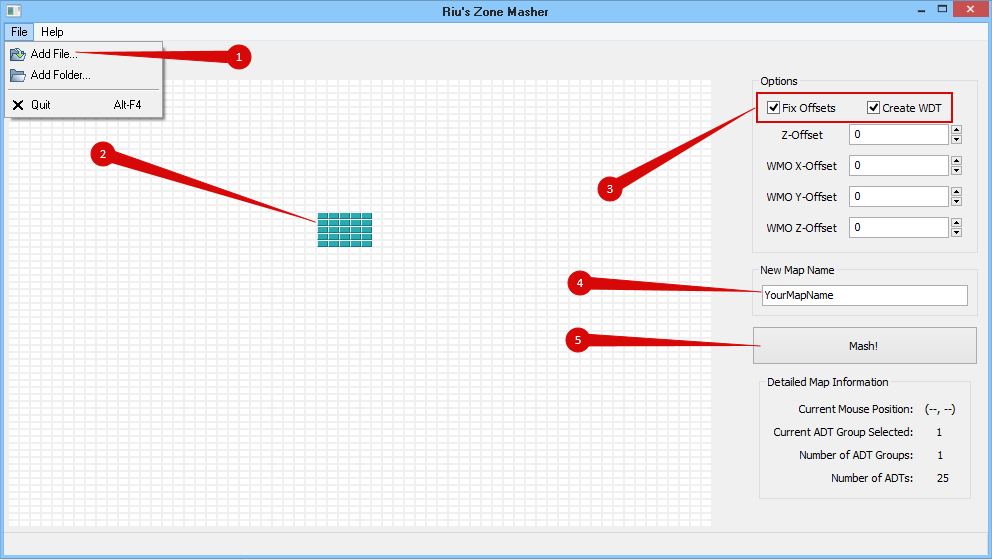
- Click on File and choose Add files. Select and open the .adt files we generated in the previous step.
- Now you should have your files imported, so that you will see them as blue squares on the grid. Move this group of .adt files to the center of the grid, so you will be able to add some extra files to expand your map from every side in the future.
- Make sure Fix Offsets and Create WDT options are enabled. Enter the map name which will again be the name of the files.
- Enter your map name
- Press Mash!
Your map files are now saved to the “Riu’s zone masher” folder. The folder will be named identically to your map name. Add this folder to your MPQ or project folder or client directory (if folder loading “WoW.exe” mod is installed) within the following path: “world\maps\”.
Once one group of .adt files is loaded, you can load some more which will appear as a separate group. This is the way you can expand your map or change the shape.
Step 3. Adding an entry to Map.dbc
Map.dbc is located in DBFilesClient folder as well as all other .dbc files. It contains different data including the real map name, map type, etc. You can read more about it on our wiki. [LINK TO WIKI] You can take the “Map.dbc” file from our tutorial map, you have been practicing on in the previous parts of the tutorial. Or you can take it from the latest locale patch. Open it with “MyDBCEditor” which can also be found in the “Tools” folder.
- Go to the end of the table and see what ID is the latest. Memorize it.
- Select Azeroth or Kalimdor line by left clicking on it.
- Right click on the selected line and choose “Copy line to”.
- Enter a free ID here. (Last UID + 1).
- Rename the field “Azeroth” to your map name. The name your .adt files have.
- Enter the real name of your map instead of Eastern Kingdoms in your language.
- Click “File” and “Save”.
- Add your “Map.dbc” to the patch, project folder or client by the following path: “DBFilesClient\”
Now you have your map working in Noggit!
-
 1
1
Recommended Comments
Create an account or sign in to comment
You need to be a member in order to leave a comment
Create an account
Sign up for a new account in our community. It's easy!
Register a new accountSign in
Already have an account? Sign in here.
Sign In Now