
Description
CUSTOM MAP TUTORIAL
- Create a project folder where you store all your custom work, including the folders used in your custom patch-x.mpq (DBFilesClient & Interface etc)
-
Copy your "Data" folder from your wow client folder to your newly created project folder.
Copy your "World" folder (custom maps) to your newly created project folder. - Make sure that your custom patch-x.mpq is in the "Data" folder you just copied to your project folder.
- Open Noggit (I use Noggit version 3.2771) and go to your "Settings"
- Check the first options "Game Path" and "Project Path" and link both these to your project folder
- Hit "Save" and restart Noggit.
- Finito! You should now have your custom map visible in your Noggit!
SCREENSHOTS (IN DEPTH)
1
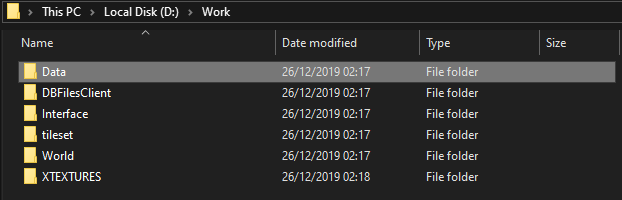
I have named my project folder "Work" 
2
This is what's inside my work folder. It's optional to use "Data" folder, but it's much more convenient if Noggit uses it's own "Data" folder instead of your wow client folder that you play on. Just make sure that whenever you have made a new patch-x.mpq for your custom map, include it in your work folder as well in "data.
4
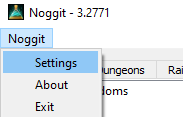
Open Noggit and navigate to the settings page
5
"Game Path" and "Project Path" should be directed to (in my case): D:\Work
If you choose not to copy your "Data" folder to your project folder, select your wow client folder in "Game Path"
ALL DONE!
You should now be able to see your custom map in Noggit once you have restarted it.
-
 1
1
Recommended Comments
Create an account or sign in to comment
You need to be a member in order to leave a comment
Create an account
Sign up for a new account in our community. It's easy!
Register a new accountSign in
Already have an account? Sign in here.
Sign In Now