Search the Community
Showing results for tags 'wmo'.
Found 80 results
-
Version 1.0.0
79 downloads
Hi! In collaboration with @kekie i've converted into game-ready models some of his human models (some are revamped parts of stormwind castle, etc.), all of them are WMO's except one that's an m2, I'll update this post whenever i do some of his other models (gotta finish some fountains, and small pieces that would all be m2), i'll update too in the future if he creates/finishes some other models. My part of the work has been finishing some unfinished model parts, some UV seams fixes, added blendmaps for the fake ambient occlusion, and create simple collisions, all of that in WoW Blender Studio ^^ All the models will be into these folders: WMO's: World\WMO\Kekie6 M2: World\Kekie6 If you find any error or thing to fix, comment, and i'll try to fix and update as fast as I can ^^ Have fun with 'em! -

Version
421 downloads
hello, today with the consent of both parties i would like to share tool that i bought from Skarn SL to WMO converter since there is no working tool there You go but dont be so forward dont spam model changing net with wmo to sl pack's since it request still work into wbs etc only open wmos are gtg the BETTER tool is in development and EIntemporeldoing hard work and soon he will share his to modding that that will be big lvl up to everyone of us -
Version 1.0.0
277 downloads
Recently needed to get modern WMOs for map viewing/upconversion and since all massfuckport packs don't have post-filedataid WMOs or they are straight up broken - here are mine (they are still fuckports and some might still be broken). 7zip Archive (2.55gb) - Download Here MPQ Format (3.98gb) - Download Here Should include WMOs from: 8.1.5 Arathi/Warsong, Warfronts, 8.2 Nazjatar/Mechagon, 8.3 Nyalotha/Horrific Visions, NPE, 9.0 Shadowlands (Beta), 9.1 Korthia, 9.2 Zereth Mortis, 10.0 Dragon Isles, 10.1 Underground (PTR), 10.1.5 Dawn of the Infinite, as well as dungeon kits and unknown models. Some might have been missed, a handful fucked ones were cut. Tested all of them in Noggit so no clue how broken they will be ingame. Things to note: -no m2s in this release, just wmos and blps (wow.export has problems extracting blend textures so those might occasionally be missing) -9.0 WMOs are from the earliest SL client so might be early versions -9.2+ Has new "split groups" tech, WMOs that use it will have broken collision and it will look like there's a missing portal between interior groups -10.0+ Has new "multiple materials" tech, some textures will look just wrong All of these can be redone/fixed by hand in Blender, I just needed these to be renderable in noggit For porting: Modern clients use filedataid, filenames are community-only. Names/folders might change from time to time but filedataid stays the same, so with a change in listfile adt converters might not find the proper references and break. If you are planning on using these to upconvert maps to BFA/SL/DF use this listfile. Tools used: wow.export, ayahne's wmo converter, adspartan's multiconverter. -
Version 1.0.0
1,117 downloads
Most WMOs from cata to BFA ported to 3.3.5a working on WMV version 7.0.1 r206 32bit: https://storage.googleapis.com/google-code-archive-downloads/v2/code.google.com/wowmodelviewer/WMV_Installer_v0701_r206_Win32.msi 64bit: https://storage.googleapis.com/google-code-archive-downloads/v2/code.google.com/wowmodelviewer/WMV_Installer_v0701_r206_Win64.msi Due to IRL problems, this project has been discontinued. There will be no more updates to this unless needed. To report a WMO that isnt working, please send to this email address: wmonowork@gmail.com subject: modelname (ex.6or_garrisontower01.wmo) in message: explain what happens when you try to load it into WMV, noggit, or in-game patch m- Cataclysm patch n- Mists of Pandaria patch o- Warlords of Draenor patch p- Legion patch q- Battle for Azeroth- 6 comments
-
- 10
-

-

-
Version 1.2.0
105 downloads
Releasing Bizmo's Brawlpub/Deeprun Dram Pub + Assets. Does not include Gameobject/NPC Spawns or DBCS Contains: Deeprun WMO With Brawlpub + textures Deeprun m2 files with textures. Contains Mapfiles Contains Minimap files. -
Version 1.0
238 downloads
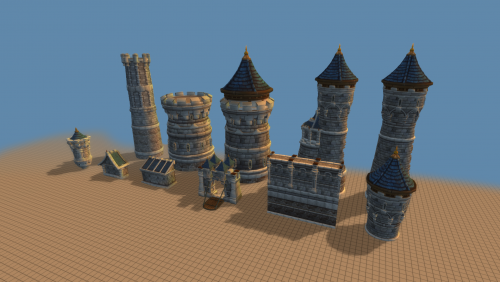
Lordaeron City model pack I'm sharing a model pack containing quite a few Lordaeron City themed models. Some models are simple edited cuts of the original Undercity wmo model, some models are custom made. Many of the models in the pack come from a joint collaboration of me and SinisterX (MTL). I share this pack in hope that Noggit lego-builders will make a great use of it. List of models: Wall - wmo Wall Tower - wmo Gate - wmo Arch Wall - wmo Arch Wall Gate - wmo Altar - wmo Astronomer's Tower Section - wmo City Tower - wmo City Road Ruins - wmo Lordaeron Barracks - wmo Lordaeron Small House - wmo Lordaeron Large House - wmo Lordaeron Chapel - wmo Lordaeron Stables - wmo Lordaeron Crypt - wmo Lordaeron Small Wall - m2 Lordaeron Fountain - m2 Lordaeron Statue01 (Terenas Menethil) - m2 Lordaeron Statue02 (Warrior) - m2 - Note that wmo models are lego friendly and m2 models can be put into their interior with exception of Barracks (they use human generic doodad pack). - Eventhough I tested the models in-game, there may be some model issues, if you find any such issue, do let me know please, I will do my very best to fix it! There goes link to the MTL Undercity series: -
THE ADDON IS OUT OF DATE! THE UPDATE WILL COME ~ ON SUMMER Introduction Hello, Model Changing Network. In this tutorial I want to show you how to edit and create WMO models using Blender WMO addon. Actually, this addon is much more than a usual import/export Blender plugin. Besides core functionality of importing and saving edited WMOs, this addon is also a powerful editor supporting nearly all (you still cannot create working transport objects with it) features of World of Warcraft World Model Object (WMO) files. What is World Model Object? World Model Object or just a WMO is a special compound 3D structure used in the game World of Warcraft for making buildings, dungeons and other big complicated 3D objects. It does not only contain traditional 3D model parts as geometry, UV maps, materials and so on; but it does also support features like liquids, complex lighting system, portal culling system and much more. Donation The provided software is available completely free of charge, however, if you want to support the development, here is Skarn's PayPal account. He is also working on a similar Blender plugin for .M2 models. So, by helping him, you can speed up the development of two tools at once. Currently supported features: Geometry Materials Lightmaps Double-UVs Collision and more. Portals Liquids Lights Fogs Doodad Sets Various WMO settings Requirements Blender WMO addon WoW Model Viewer BLPConverter Part 1. Installing addon and configuring your Blender Download and install the latest Blender version (2.78c or newer). Download WMO addon and place it into addons folder inside of your Blender folder: blender\x.xx\scripts\addons\io_scene_wmo\ Download WoW Addon Pack which contains WoW Model Viewer and BLPConverter and place it into your WoW Tools folder: In this tutorial I will use this path: D:\Work\WoWTools\ Step 1. Enable the WMO addon Step 2. Fill your tools paths Always click on Save User Settings button after editing the addon preferences Now you are able to export and import .wmo models right from your Blender Part 2. Basics and peculiarities of WMO editing using Blender This addon is designed in quite a special way and it would probably be better to import some existing .WMO model from WoW to learn how to operate it because the WMO from WoW will be already configured correctly by itself. For this purpose, I am going to use a small human farm. In this tutorial I won't explain how to create models in Blender. I will just tell you how to make them work as a .wmo in the game. I will cover the unusual parts that are different from the normal Blender usage. Quick WMO Tab This tab is the easiest way to edit your model. There are few main sections: Display - used for displaying different object types on the scene Add to scene - used for adding different object types to the scene Game data - used for loading your WoW MPQ patches from your data folder (Part 1 Step 2) Selected - used for converting selected objects and materials Apply - used for applying different actions to objects Doodads - used for doing different actions with the doodads on the scene Material This addon uses his own special material properties called WoW Material which are bound to Blender material. There you can specify the texture you apply to the model by setting a path to it and a few other less important settings: Shader used for producing special WoW render effects Terrain Type used for producing footsteps sounds and footprints Blending used to control texture blending on rendering Texture 1 diffuse texture (object) Texture 2 environment texture (blending) Flags used for defining special render options for the texture Emissive Color the color of the object when no light falls on it Diffuse Color base color of the object Flags Unlit disable world lighting effect Unfogged disable world fog effect TwoSided render from both sides Exterior light ignore local WMO lighting, use world lighting instead NightGlow used for windows to glow at nighttime Window has no description yet, used for windows In order to assign the texture to the geometry you need to assign a usual (Blender) material to it Go to material properties, find a tab called WoW Material and specify the required settings there: When you assign and tweak all of them, the textures will be visible in-game Collision In order to create collision for a model you need to go to Quick WMO Tab and click on Quick Collision: That's all! One button click - pretty easy, isn't it? WMO groups World of Warcraft WMO supports two group types - indoor and outdoor. Outdoor is used for exterior objects and is influenced by the zone lighting. Indoor is used for interior models, interior parts of models. It is not getting influenced by the external light. If you are planning to use indoor groups in your scene you will have to create portals for them. I will explain how to make them later. For setting group types, select your objects and click to Convert selected --> To WMO group and also specify a type of the group: In the same preference tab you can also see various settings: Name - Object's name is saved into the files and is only used for development purposes, for example, when you inspect your model using a 010 editor. Please do not name as "Antiportal", an internally reserved name that actually makes sense for the game. Description - group description, which is also used only for development purposes. Name it whatever you want or leave blank. Place Type - select type for your group: indoor or outdoor. Flags - enable/disable different flags for your model. You can always see the description of each flag when you hover it: DBC GroupID - connected with AreaID for WMO. Used to detect indoor groups for example, so the server can dismount you when you enter them. LiquidType - fills this WMO group with selected liquid. Portals Portals are used to connect indoor groups to outdoor groups or other indoor groups. If the portal is not set but the indoor group is used, you will have the indoor group rendered only while standing in it, everything else will look like emptiness. A portal is a plane that, in most cases, contains only 4 vertices and one face. Portals are created as separate objects (you can see them in the outliner if you import some original WMO like I did with human farm). If the portal is bugged in-game: Step 1. Select your portals Step 2. Use Bake portal relations button Step 3. Use Set portal direction button with Auto option selected If it is still bugged, try one either Positive or Negative unless the portal starts working. If it does not help, make sure that relation baking algorithm has bound the correct WMO groups to the portal object. Creating custom portal geometry There is nothing complicated in making custom portal geometry. Though, remember that it should be precisely on the edges that connected groups share between each other. So, in order to create a correct plane for a custom portal select one of the groups. Simply select 4 corner vertices and press F. It will generate a plain between them. Then select this plane and press P. In the opened menu choose By selection. It will detach the plane to a separate an object, so that you can fill in the settings. If you move the portal from that point it will be bugged in-game on camera rotation. Be careful with that. Step 1. Convert your plane to WMO Portal: Step 2. Bake portal relations. Step 3. Set portal Auto direction if set otherwise. Done! Much easier than in previous addon version. Just make your plane and click on these 3 buttons. Easy peasy Vertex color You can paint vertex colors on WMO groups. It is used for lighting and coloring particular places of a group. For doing that switch to Vertex paint mode. You can learn vertex painting features by practice or by using some Blender tutorials or documentation. Don't forget to enable Vertex color flag in WoW WMO Group tab else the color won't be seen in game. The flag is forced on export for indoor groups, though. For filling, pick up a color and press Shift + K Better than Photoshop, right? Fog The fog effect mimics the scattering of light in a fog. Objects in the distance become less contrasting and acquire a fog color. In night scenes fog is usually dark, in daytime - whitish or slightly bluish, just like real fog. In Blender WoW Fog looks like transparent sphere. In order to add a fog, you just need to click on Add Fog button in Quick WMO Tab: Fog has some simple options to work with: Ignore Radius (probably) makes fog global Inner Radius a radius of fog starting to fade Farclip anything further away from the eye than the far clipping distance isn't displayed (it's too far away) Nearclip anything closer to the eye than the near clipping distance isn't displayed (it's too close) Color fog color Underwater farclip same as Farclip, but under the water Underwater nearclip same as Nearclip, but under the water Underwater Color fog color under the water One-button-action. Again?! Water Water - used to make WoW liquid in your model. In order to add water you need to click on Add Water button in Quick WMO tab: You can't scale water! Just edit your water size (subdivisions) in left bottom corner when you're creating it. WoW Liquid group has own options: LiquidType - type of liquid in WoW. There are lots of variants to work with: Color - water color WMO Group - parent group for this liquid. Use an eyedropper or type the WMO group name to select a parent object. Flags If you switch to vertex paint mode when the water plane is selected, you will be able to set flags to quads that control the rendering of the water. We do not yet know what most of them means, so if you figure that out, please tell Skarn, he will rename the buttons. There is an easy way to work with water. Just tweak your options to get a perfect result. Scale This function is used to add a visual placeholder for taking some information about your model proportion. Just click on the button: You can edit your Scale Type in the left bottom corner when you're creating it: Batch Types. Lightmaps. Blendmaps. Second UV Batches are groups of faces which are used to accelerate rendering. World of Warcraft WMO supports two batch types - Batch A and Batch B. Batches are usually used only for interior groups. Batch A is influenced by the outdoor (zone) lighting. Batch B is not getting influenced by the external light from outdoor groups. Lightmaps - used to accelerate light rendering. Normally used in Batches A in order to blend the geometry with world lighting. See the entrance of the human farm in order to see how it works. Blendmaps - used to accelerate texture blending. If your material is using one of the TwoLayer shaders, you enter a second environment texture path, which will blend with the diffuse texture according to lightmap values. SecondUV - used to define the UV map for double texture materials. Just create a new UVmap, edit it and bind to this property. Step 1. Enable Edit Mode Step 2. Assign faces to vertex group Step 3. Select your group in batch vertex group In order to work with Lightmaps: Step 1. Create vertex group, enable Weight Paint Mode and do your edits Step 2. Select your group in Lightmap vertex group Weight Paint palette: Weight = 1 - red color. Maximum effect Weight = 0 - blue color. Nothing happens. You can learn weight painting features by practice or by using some Blender tutorials or documentation. Blendmaps are painted by the same way. Just try it by yourself. Not so long for making your model looks realistic. Just keep improving your skills at it. Doodads and models importing This function is used to import WoW models (.M2 and .WMO) directly from WoW Model Viewer in a very fast way. Add WMO - used to import the last selected .WMO model from WoW Model Viewer. Imported model will be just a usual Blender object to be edited. Add M2 - used to import last selected .M2 model from WoW Model Viewer. This model is just a visual placeholder for real WoW model. Imported model will have the property WoW Doodad assigned. WoW Doodad has own options: Path - real WoW model path in your patch Color - Doodad color (overlayed effect) Accept Projected Texture - keep textures with enabled Projected Textures in WoW game options Adjust lighting - applying local doodad lighting For WoW Doodad you can edit only position, rotation and 3-axes scaling. You can't scale one or two axes. You won't probably be able to see the changes correctly in game in that case. Doodadset Doodad sets are used to group doodads on your scene into sets. The model can have multiple sets which can be chosen in the map editor to be displayed in one particular WMO instance. Normally they are used to create different furniture blocks to add some variations to the appearance of the model. See the human farm once again as an example. Another common usage is to create the normal set of furniture and the broken set of furniture, see Westfall packs of human buildings. There is always one global doodad set which is displayed along with the selected set. Global doodad set cannot be turned off, however, it may be empty. See the global doodad set in human farm once again - it contains a few crates, some barrels, and smoke coming from the chimney. Those doodads are displayed on all the sets available. If you do not create a global doodad set, empty one will be created on export automatically. In order to add doodads to the doodad set: Select them and click Add to doodadset, there you will be able to create a new doodad set, create a new global doodad set or add to existing doodad set. Choose whatever you need. Export There are some export settings to be observed when you are ready to see your awesome model in the game: Operator presets - allows you to store "favorite" export settings for WMOs. Export selected objects - makes the exporter export only selected objects on the scene. Fill texture paths - automatically fills empty WoW Material texture paths based on texture filenames. Does not change the properties, in contrast to the same operator from the Quick WMO panel. Part 3. Balkron's tips & tricks 1. The fastest way to add anything You can press Shift+A hotkey to add anything to your scene very fast: 2. Disabling black vertex color As you can see, sometimes when you import models, they are black as night. So you can disable this problem: just create new vertex color layer and fill it with white color by Shift+K hotkey: 3. Disabling doodads lines 4. My tips for viewport You can switch your Viewport Shading options: My tips: modeling - Solid + disabled Textured Solid Simplified white models without textures. Easy to work with. bug-finding - Texture That way I can easily find UV-bug or geometry-bug, because there is no shading, but it keeps the textures. overview - Solid + enabled Textured Solid + white vertex color layer It ts the best way to take a look at your model without distortions. difficult model parts - Wireframe Just enable and select what you want without clipping and camera moving. 5. Numpad buttons I'm always using numpad buttons to navigate my models: Num 1 - front view Num 3 - right side view Num 4/6 - horizontal rotation Num 2/8 - vertical rotation Num 5 - orthographic mode Num 7 - top view Num 9 - flip to top/bottom view 6. Hotkeys Always try to learn Blender hotkeys. They will speed-up your work significantly. 7. Other addons You can download other addons to improve your workflow. I recommend F2, Magic UV, Loop Tools and Quad Unwrap. 8. Customize it Always keep making your workflow to be better. Custom hotkeys, themes, tabs placement - just try to make Blender work with you in the fastest way. 9. First person navigation (from Gratural) One more trick - Fly mode. Perfect tool for overwiev and camera move across your WMO's. Hotkeys: Shift+F - enable mod WASD - moving Shift - moving acceleration Space - jump to target face G - enable gravity LMB/Enter - disable fly mode Scroll Up/ Scroll Down - increase/decrease speed 10. Balkron's gifts I decided to share my settings-files with you. There are custom settings, hotkeys and theme. I hope you will find it cool and helpful Settings startup.blend userpref.blend Setup: %AppData%\Roaming\Blender Foundation\Blender\x.xx\config Theme balkron.xml Setup: Blender\2.78\scripts\presets\interface_theme Thanks for reading! This tutorial is relevant to the recent version of WMO addon for Blender. If the addon gets updated, the tutorial will be updated too. startup.blend userpref.blend balkron.xml
- 59 comments
-
- 14
-
-
Version 1.0.1
70 downloads
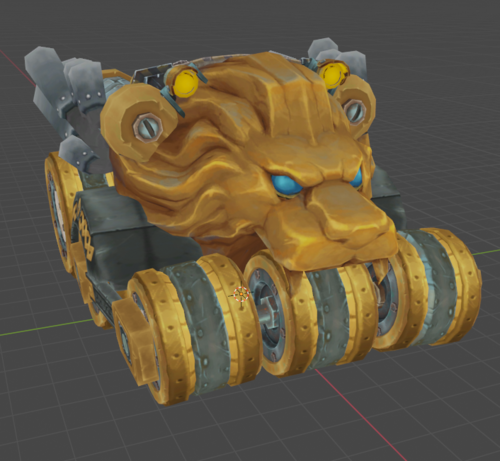
Hi, This is my first upload so bare with me! I made a custom Alliance style tank, inspired by the OG dwarven tank. It is made up from various assets from Warlords of Dreanor and Battle for azeroth. Nearly all used textures are either modified or crafted from scratch (mostly just modified though). All you need to do is download 'patch-J' and throw it into your Data folder (inside the world of warcraft 3.3.5a/Data). I want to give a special thankyou to loremaster, for explaining me how to convert my obj file to WMO and putting it into a patch Have fun and make sure to post pictures of the projects you use this asset for! -
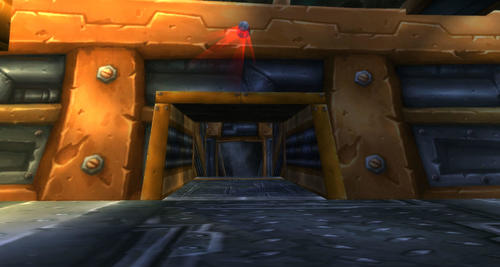
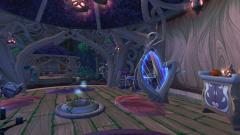
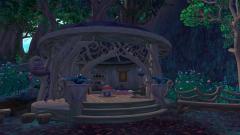
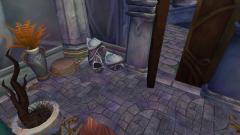
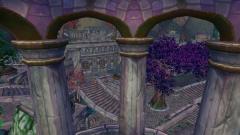
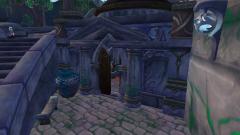
From the album: Therion Village over ancient ruins
-
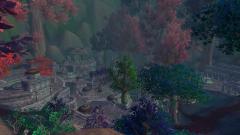
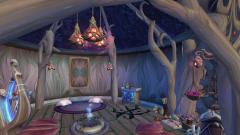
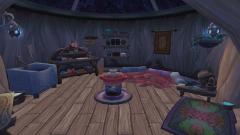
From the album: Therion Village over ancient ruins
-
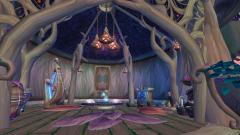
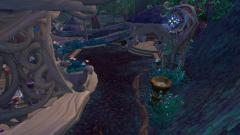
From the album: Therion Village over ancient ruins
-
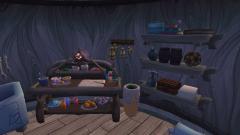
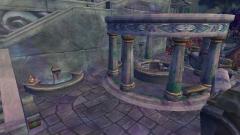
From the album: Therion Village over ancient ruins
-
From the album: Therion Village over ancient ruins
-
From the album: Therion Village over ancient ruins
-
From the album: Therion Village over ancient ruins
-
From the album: Therion Village over ancient ruins
-
- 1
-
-
- Therion Village 2022
- Wmo
- (and 1 more)
-
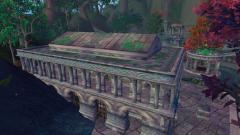
From the album: Therion Village over ancient ruins
-
From the album: Therion Village over ancient ruins
-
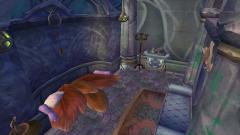
From the album: Therion Village over ancient ruins
-
From the album: Therion Village over ancient ruins
-
From the album: Therion Village over ancient ruins
-
From the album: Therion Village over ancient ruins
-
- 1
-
-
- Therion Village 2022
- Wmo
- (and 1 more)
-
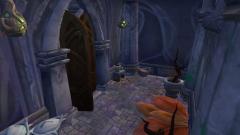
From the album: Therion Village over ancient ruins
-
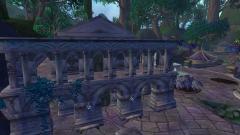
From the album: Therion Village over ancient ruins
-

From the album: Therion Village over ancient ruins