Search the Community
Showing results for tags 'blender'.
Found 26 results
-
Hi! The other day I posted in the modding discord Tomkek's DeathSaber with some added effects, some people have asked there, and privately how to do the light border and other things, so, here we're, I'll publish some short videos on how to accomplish it, the videos assume you've some knowledge already of Blender and WBS, but I show and write all the shortcuts and how to reach the goals, also I include the .blend file, so you can test over the same prepared model. Official M2 Build from WBS discord: https://discord.com/channels/402049199740289025/958430982359375962/1006360118595694602 My edited M2 Build for exporting second UVMap (will be useful for the next tutorials): https://drive.google.com/file/d/1iBwH7UTjiRGwLu2sehIMc2DMRAdCyb6k/view?usp=share_link WoW Blender Studio Discord: https://discord.gg/8rskkJwC Thanks to Tomkek for giving me permission on using his model for this, visit his channel: https://www.youtube.com/@Tomkektv DeathSaber_RequiredFiles.rar
-
Version 1.0.0
48 downloads
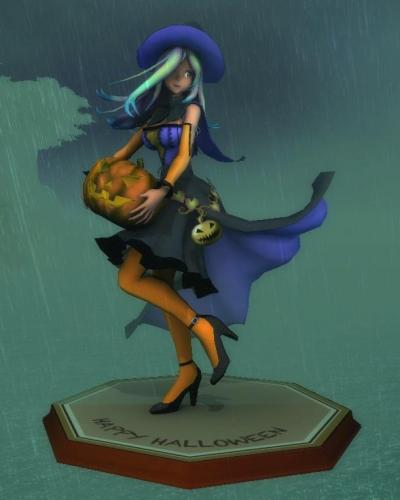
halloween! -
Tutorial in Text I am too lazy to make it beatiful in here so go have fun with my bland .txt Video <- It takes awhile to upload, then for full hd so check back in 1 hour thanks to @everyone for helping me along the way especially ~alter.Ξgø#7193
- 1 comment
-
- 5
-

-

-
- wotlk
- collections
- (and 1 more)
-
THE ADDON IS OUT OF DATE! THE UPDATE WILL COME ~ ON SUMMER Introduction Hello, Model Changing Network. In this tutorial I want to show you how to edit and create WMO models using Blender WMO addon. Actually, this addon is much more than a usual import/export Blender plugin. Besides core functionality of importing and saving edited WMOs, this addon is also a powerful editor supporting nearly all (you still cannot create working transport objects with it) features of World of Warcraft World Model Object (WMO) files. What is World Model Object? World Model Object or just a WMO is a special compound 3D structure used in the game World of Warcraft for making buildings, dungeons and other big complicated 3D objects. It does not only contain traditional 3D model parts as geometry, UV maps, materials and so on; but it does also support features like liquids, complex lighting system, portal culling system and much more. Donation The provided software is available completely free of charge, however, if you want to support the development, here is Skarn's PayPal account. He is also working on a similar Blender plugin for .M2 models. So, by helping him, you can speed up the development of two tools at once. Currently supported features: Geometry Materials Lightmaps Double-UVs Collision and more. Portals Liquids Lights Fogs Doodad Sets Various WMO settings Requirements Blender WMO addon WoW Model Viewer BLPConverter Part 1. Installing addon and configuring your Blender Download and install the latest Blender version (2.78c or newer). Download WMO addon and place it into addons folder inside of your Blender folder: blender\x.xx\scripts\addons\io_scene_wmo\ Download WoW Addon Pack which contains WoW Model Viewer and BLPConverter and place it into your WoW Tools folder: In this tutorial I will use this path: D:\Work\WoWTools\ Step 1. Enable the WMO addon Step 2. Fill your tools paths Always click on Save User Settings button after editing the addon preferences Now you are able to export and import .wmo models right from your Blender Part 2. Basics and peculiarities of WMO editing using Blender This addon is designed in quite a special way and it would probably be better to import some existing .WMO model from WoW to learn how to operate it because the WMO from WoW will be already configured correctly by itself. For this purpose, I am going to use a small human farm. In this tutorial I won't explain how to create models in Blender. I will just tell you how to make them work as a .wmo in the game. I will cover the unusual parts that are different from the normal Blender usage. Quick WMO Tab This tab is the easiest way to edit your model. There are few main sections: Display - used for displaying different object types on the scene Add to scene - used for adding different object types to the scene Game data - used for loading your WoW MPQ patches from your data folder (Part 1 Step 2) Selected - used for converting selected objects and materials Apply - used for applying different actions to objects Doodads - used for doing different actions with the doodads on the scene Material This addon uses his own special material properties called WoW Material which are bound to Blender material. There you can specify the texture you apply to the model by setting a path to it and a few other less important settings: Shader used for producing special WoW render effects Terrain Type used for producing footsteps sounds and footprints Blending used to control texture blending on rendering Texture 1 diffuse texture (object) Texture 2 environment texture (blending) Flags used for defining special render options for the texture Emissive Color the color of the object when no light falls on it Diffuse Color base color of the object Flags Unlit disable world lighting effect Unfogged disable world fog effect TwoSided render from both sides Exterior light ignore local WMO lighting, use world lighting instead NightGlow used for windows to glow at nighttime Window has no description yet, used for windows In order to assign the texture to the geometry you need to assign a usual (Blender) material to it Go to material properties, find a tab called WoW Material and specify the required settings there: When you assign and tweak all of them, the textures will be visible in-game Collision In order to create collision for a model you need to go to Quick WMO Tab and click on Quick Collision: That's all! One button click - pretty easy, isn't it? WMO groups World of Warcraft WMO supports two group types - indoor and outdoor. Outdoor is used for exterior objects and is influenced by the zone lighting. Indoor is used for interior models, interior parts of models. It is not getting influenced by the external light. If you are planning to use indoor groups in your scene you will have to create portals for them. I will explain how to make them later. For setting group types, select your objects and click to Convert selected --> To WMO group and also specify a type of the group: In the same preference tab you can also see various settings: Name - Object's name is saved into the files and is only used for development purposes, for example, when you inspect your model using a 010 editor. Please do not name as "Antiportal", an internally reserved name that actually makes sense for the game. Description - group description, which is also used only for development purposes. Name it whatever you want or leave blank. Place Type - select type for your group: indoor or outdoor. Flags - enable/disable different flags for your model. You can always see the description of each flag when you hover it: DBC GroupID - connected with AreaID for WMO. Used to detect indoor groups for example, so the server can dismount you when you enter them. LiquidType - fills this WMO group with selected liquid. Portals Portals are used to connect indoor groups to outdoor groups or other indoor groups. If the portal is not set but the indoor group is used, you will have the indoor group rendered only while standing in it, everything else will look like emptiness. A portal is a plane that, in most cases, contains only 4 vertices and one face. Portals are created as separate objects (you can see them in the outliner if you import some original WMO like I did with human farm). If the portal is bugged in-game: Step 1. Select your portals Step 2. Use Bake portal relations button Step 3. Use Set portal direction button with Auto option selected If it is still bugged, try one either Positive or Negative unless the portal starts working. If it does not help, make sure that relation baking algorithm has bound the correct WMO groups to the portal object. Creating custom portal geometry There is nothing complicated in making custom portal geometry. Though, remember that it should be precisely on the edges that connected groups share between each other. So, in order to create a correct plane for a custom portal select one of the groups. Simply select 4 corner vertices and press F. It will generate a plain between them. Then select this plane and press P. In the opened menu choose By selection. It will detach the plane to a separate an object, so that you can fill in the settings. If you move the portal from that point it will be bugged in-game on camera rotation. Be careful with that. Step 1. Convert your plane to WMO Portal: Step 2. Bake portal relations. Step 3. Set portal Auto direction if set otherwise. Done! Much easier than in previous addon version. Just make your plane and click on these 3 buttons. Easy peasy Vertex color You can paint vertex colors on WMO groups. It is used for lighting and coloring particular places of a group. For doing that switch to Vertex paint mode. You can learn vertex painting features by practice or by using some Blender tutorials or documentation. Don't forget to enable Vertex color flag in WoW WMO Group tab else the color won't be seen in game. The flag is forced on export for indoor groups, though. For filling, pick up a color and press Shift + K Better than Photoshop, right? Fog The fog effect mimics the scattering of light in a fog. Objects in the distance become less contrasting and acquire a fog color. In night scenes fog is usually dark, in daytime - whitish or slightly bluish, just like real fog. In Blender WoW Fog looks like transparent sphere. In order to add a fog, you just need to click on Add Fog button in Quick WMO Tab: Fog has some simple options to work with: Ignore Radius (probably) makes fog global Inner Radius a radius of fog starting to fade Farclip anything further away from the eye than the far clipping distance isn't displayed (it's too far away) Nearclip anything closer to the eye than the near clipping distance isn't displayed (it's too close) Color fog color Underwater farclip same as Farclip, but under the water Underwater nearclip same as Nearclip, but under the water Underwater Color fog color under the water One-button-action. Again?! Water Water - used to make WoW liquid in your model. In order to add water you need to click on Add Water button in Quick WMO tab: You can't scale water! Just edit your water size (subdivisions) in left bottom corner when you're creating it. WoW Liquid group has own options: LiquidType - type of liquid in WoW. There are lots of variants to work with: Color - water color WMO Group - parent group for this liquid. Use an eyedropper or type the WMO group name to select a parent object. Flags If you switch to vertex paint mode when the water plane is selected, you will be able to set flags to quads that control the rendering of the water. We do not yet know what most of them means, so if you figure that out, please tell Skarn, he will rename the buttons. There is an easy way to work with water. Just tweak your options to get a perfect result. Scale This function is used to add a visual placeholder for taking some information about your model proportion. Just click on the button: You can edit your Scale Type in the left bottom corner when you're creating it: Batch Types. Lightmaps. Blendmaps. Second UV Batches are groups of faces which are used to accelerate rendering. World of Warcraft WMO supports two batch types - Batch A and Batch B. Batches are usually used only for interior groups. Batch A is influenced by the outdoor (zone) lighting. Batch B is not getting influenced by the external light from outdoor groups. Lightmaps - used to accelerate light rendering. Normally used in Batches A in order to blend the geometry with world lighting. See the entrance of the human farm in order to see how it works. Blendmaps - used to accelerate texture blending. If your material is using one of the TwoLayer shaders, you enter a second environment texture path, which will blend with the diffuse texture according to lightmap values. SecondUV - used to define the UV map for double texture materials. Just create a new UVmap, edit it and bind to this property. Step 1. Enable Edit Mode Step 2. Assign faces to vertex group Step 3. Select your group in batch vertex group In order to work with Lightmaps: Step 1. Create vertex group, enable Weight Paint Mode and do your edits Step 2. Select your group in Lightmap vertex group Weight Paint palette: Weight = 1 - red color. Maximum effect Weight = 0 - blue color. Nothing happens. You can learn weight painting features by practice or by using some Blender tutorials or documentation. Blendmaps are painted by the same way. Just try it by yourself. Not so long for making your model looks realistic. Just keep improving your skills at it. Doodads and models importing This function is used to import WoW models (.M2 and .WMO) directly from WoW Model Viewer in a very fast way. Add WMO - used to import the last selected .WMO model from WoW Model Viewer. Imported model will be just a usual Blender object to be edited. Add M2 - used to import last selected .M2 model from WoW Model Viewer. This model is just a visual placeholder for real WoW model. Imported model will have the property WoW Doodad assigned. WoW Doodad has own options: Path - real WoW model path in your patch Color - Doodad color (overlayed effect) Accept Projected Texture - keep textures with enabled Projected Textures in WoW game options Adjust lighting - applying local doodad lighting For WoW Doodad you can edit only position, rotation and 3-axes scaling. You can't scale one or two axes. You won't probably be able to see the changes correctly in game in that case. Doodadset Doodad sets are used to group doodads on your scene into sets. The model can have multiple sets which can be chosen in the map editor to be displayed in one particular WMO instance. Normally they are used to create different furniture blocks to add some variations to the appearance of the model. See the human farm once again as an example. Another common usage is to create the normal set of furniture and the broken set of furniture, see Westfall packs of human buildings. There is always one global doodad set which is displayed along with the selected set. Global doodad set cannot be turned off, however, it may be empty. See the global doodad set in human farm once again - it contains a few crates, some barrels, and smoke coming from the chimney. Those doodads are displayed on all the sets available. If you do not create a global doodad set, empty one will be created on export automatically. In order to add doodads to the doodad set: Select them and click Add to doodadset, there you will be able to create a new doodad set, create a new global doodad set or add to existing doodad set. Choose whatever you need. Export There are some export settings to be observed when you are ready to see your awesome model in the game: Operator presets - allows you to store "favorite" export settings for WMOs. Export selected objects - makes the exporter export only selected objects on the scene. Fill texture paths - automatically fills empty WoW Material texture paths based on texture filenames. Does not change the properties, in contrast to the same operator from the Quick WMO panel. Part 3. Balkron's tips & tricks 1. The fastest way to add anything You can press Shift+A hotkey to add anything to your scene very fast: 2. Disabling black vertex color As you can see, sometimes when you import models, they are black as night. So you can disable this problem: just create new vertex color layer and fill it with white color by Shift+K hotkey: 3. Disabling doodads lines 4. My tips for viewport You can switch your Viewport Shading options: My tips: modeling - Solid + disabled Textured Solid Simplified white models without textures. Easy to work with. bug-finding - Texture That way I can easily find UV-bug or geometry-bug, because there is no shading, but it keeps the textures. overview - Solid + enabled Textured Solid + white vertex color layer It ts the best way to take a look at your model without distortions. difficult model parts - Wireframe Just enable and select what you want without clipping and camera moving. 5. Numpad buttons I'm always using numpad buttons to navigate my models: Num 1 - front view Num 3 - right side view Num 4/6 - horizontal rotation Num 2/8 - vertical rotation Num 5 - orthographic mode Num 7 - top view Num 9 - flip to top/bottom view 6. Hotkeys Always try to learn Blender hotkeys. They will speed-up your work significantly. 7. Other addons You can download other addons to improve your workflow. I recommend F2, Magic UV, Loop Tools and Quad Unwrap. 8. Customize it Always keep making your workflow to be better. Custom hotkeys, themes, tabs placement - just try to make Blender work with you in the fastest way. 9. First person navigation (from Gratural) One more trick - Fly mode. Perfect tool for overwiev and camera move across your WMO's. Hotkeys: Shift+F - enable mod WASD - moving Shift - moving acceleration Space - jump to target face G - enable gravity LMB/Enter - disable fly mode Scroll Up/ Scroll Down - increase/decrease speed 10. Balkron's gifts I decided to share my settings-files with you. There are custom settings, hotkeys and theme. I hope you will find it cool and helpful Settings startup.blend userpref.blend Setup: %AppData%\Roaming\Blender Foundation\Blender\x.xx\config Theme balkron.xml Setup: Blender\2.78\scripts\presets\interface_theme Thanks for reading! This tutorial is relevant to the recent version of WMO addon for Blender. If the addon gets updated, the tutorial will be updated too. startup.blend userpref.blend balkron.xml
- 59 comments
-
- 14
-
-
Introduction Unfortunately, there are no tools yet that would allow you to edit an M2 directly (although @Skarn is working hard on that), so it has to be converted into an editable format and then converted back. That can be done with M2mod, and after you've read this tutorial, you will be able to perform this incredibly complicated algorithm on an expert level. This method is confirmed to be working in Cataclysm and Mists of Pandaria, and, possibly, in Warlords of Draenor. It has also been reported to not work in Legion, so I will soon edit this tutorial accordingly. Tools and resources Blender 2.77 M2mod Redux 4.6.1 M2mod Redux 4.5 (yes, you need BOTH versions of M2mod Redux) (they will be referred to as simply M2mod 4.6 and M2mod 4.5) Ladik's MPQ Editor Brains (I use version 0.0.2 alpha, but they aren't necessary anyway) The Technique Installation Download everything listed in the "Tools and resources" section. Install Blender. Extract the archives of M2mod 4.6 and M2mod 4.5 (in different folders, obviously). In the extracted M2mod 4.6, there will be another archive inside called "M2Mod scripts 1.2 Blender 2.73.zip". Move/copy it's contents into your Blender folder\2.77\scripts\addons\ (the default installation path is C:\Program Files\Blender Foundation\Blender\2.77\scripts\addons). Proceed to Model Extraction. Model Extraction Choose the model you want to edit. You can use WoW Model Viewer for that, but I can't make the tutorial that detailed. Let's say I want to edit Varian Wrynn's model to make his chin even more brutal. Open Ladik's MPQ Editor, select all the MPQs in your WoW\Data folder, tick "Merged mode" and press "Ok". Wait for the files to load. Find the location of the chosen model (in my case it is Creature\KingVarianWrynn). Extract the model and the .skin files related to it: select the files > press RMB > choose Extract > enter the desired directory > press "Ok" > wait for the files to extract. Proceed to M2->M2i Conversion. M2->M2i Conversion Open the folder with M2mod 4.6 and launch M2ModRedux.exe. Choose the "Export" tab. In the InputM2 field browse the path to your extracted model and choose the .m2 file (in my case it's KingVarianWrynn.m2). Press "Go!". Wait for the Status to say "Export done". Proceed to Modeling. Modeling Open your Blender folder and run blender.exe. Go to File > User Preferences > Add-ons tab > find "Import-Export: Import: WoW M2 Intermediate (.m2i)" and "Import-Export: Export: WoW M2 Intermediate (.m2i)" > tick both of them > press "Save User Settings" > close the Blender User Preferences window. Go to File > Import > M2 Intermediate (.m2i) > find the converted model from M2->M2i Conversion, step 2 and press "Input M2i". Edit the model however you wish. Through hard work and skill, I made Varian look even more brutal than before. Go to File > Export > M2 Intermediate (.m2i) > choose the path you want > press "Export M2I". Proceed to M2i->M2 Conversion. M2i->M2 Conversion Open the folder with M2mod 4.5 and launch M2ModRedux.exe. In the InputM2 field browse the path to the original model (in my case it's KingVarianWrynn.m2). In the InputM2I field browse the path to your edited model (in my case it's KingVarianWrynn.m2i). In the OutputM2 files choose the path and name of the new model (I'll just replace the original KingVarianWrynn.m2). Press "Go!". There is no Status, so just wait. Proceed to Patching. Patching I assume you know how to compile a patch using Ladik's MPQ Editor. Enjoy your edited model! Edit 17/05/18: As per popular demand, I will add a section with Legion modeling instructions within the two upcoming weeks.
-
Once you have imported a model and while editing it, you will see exactly how it will look once added to the game, thanks to the addon's automatic generation of materials for blizzlike rendering. Here is a comparison of the same WMO imported with the addon (left) and as an .obj via WMV (right): The addon supports both the internal Blender renderer (soon to become Eevee renderer) and Cycles renderer, with materials generated for the one you import the model in. You can change the renderer and re-generate materials at any time. The addon provides you with a vast array of tools to show, hide, and edit any aspect of the WMO. You can change the existing mesh, create new rooms with portals between them, move doodads around, and light everything up! In addition to manual editing, many tasks can be auto-performed globally, for example ambient lighting: Doodads, too, can be lightmapped manually or auto-aligned to fit the surroundings:
-
Version ALPHA 0.1
128 downloads
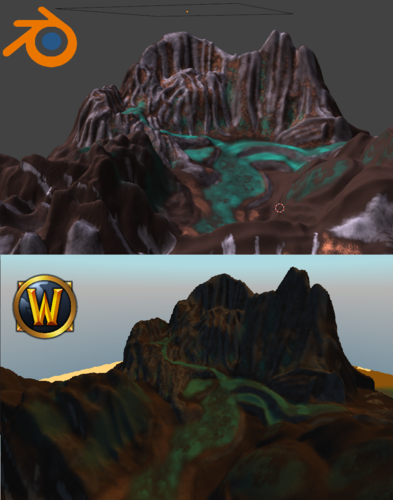
(WIP ALPHA 0.2 Already overhauled the Template but it needs a bit Optimization) This is a Template File, which allows you to Create awesome Terrains for the WoW Version 3.3.5. The (EXAMPLE) in the Zip File uses Shadowlands and BFA Tilesets otherwise they will displayed as Errors but you can easily switch those Textures. It uses the usage of the Programs: ObjtoADT Prints the Height of the Model into an WoW ADT. Futa Prints the Alphamaps into an ADT. A tutorial Video can you find here of the Export Progress: -
I have a simple question. Is it possible to import character models remde in Shadowlands for example humanfemale_hd and others. I did it about a year ago and now I have no problem in importing Vulpera male. Only the new models are problematic (I tried also other models). I was using Blender 2.79b and M2Mod v8.3.0 with 8.2.0 scripts for import M2I.
-

Version 0.0.2
163 downloads
A Blender Scene with an Alphamap Generator and the Original ADT Size. USED ADDONS BLENDER: A.N.T. Official Blender Addon, WoW Blender Studio, UNITY: Terrain Tools Unity works extremely well with the Terrain Generation using the 2019 Version in combination with the Terrain Tools and a Terrain Export Script and the Alpha Generator from Blender you can take any terrain shape from any Expansion and print it into a Unity Terrain aswell Texturing. The Terrain inside the Grid is 1 ADT. To get the Raw data out of the Terrain, on the top you can export the Terrain as .OBJ and with the Terrain Tools under the Menu Asset/Terrain Tool you can export your texture Layers as RGB the PNG is in a weird format, open it with your favourite Image Editor and Seperate the Image by Color, RGB and there are now the 3 Texture Layers-> Desaturate them and theyre ready to use for FUTA. To Convert the Terrain to an ADT use the ObjtoADT: OBJtoADT -
 How do I Isolate the lighting and effects from this WMO file in blender 2.79b so that I can edit the lighting? I was to make a new non-copy-paste area (a third wing for elites that ultimately leads into a new dungeon) in order to create new areas from scratch. How does one edit the lighting and effects that are 'baked' into the WMO model? What else am I missing here?
 -
Version 1.2
153 downloads
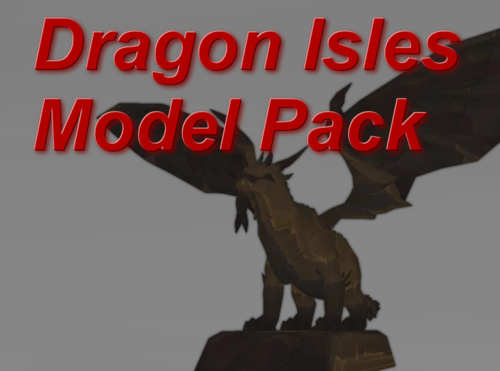
I've decided to share some of my custom made models made for nearly finished Dragon Isles zone. I hope somebody finds use for these models. It is likely I will add more in future, or change the existing ones. If you run into any issues with the models, write it down to the comment or PM me, I will do my best to gest those fixed. Patch-M contains: M2 and WMO models with textures and all non WoTLK M2s doodads used for the models. If you are interested in Dragon Isles custom zone, which makes use of these models: https://mega.nz/#!LZxHDIQa!zCLRjttIxUXP_VtnlXBH9Jb52QQzrqpUR5j10SAFufM Update 1 - 1.1 - Added more models - Dragon Towers, Dragon Stones, Dragon Tablets, Dragon Vasas - each model has a normal and a damaged variant. - Fixed some texture issues, fixed a missing model issue. - Minor changes to doodad sets. - Added more vertex paint. - Slightly decreased patch size - most of useless files were removed. Update 2 - 1.2 - The Master's lair model is more detailed now. - Fixed the shader on the dwarven ship. More details were also added.- 1 comment
-
- 5
-
-
- dragon_isles
- blender
- (and 3 more)
-
The addon allows you to import any M2 or WMO without conversion: either an extracted one from somewhere on your computer or directly from WoW Model Viewer. In both cases, the addon will do its best to find the required textures, doodads, etc. and import them automatically, unless you tell it otherwise.
-
Hi people! Recently I wanted to start modeling, searched for some guides online and downloaded everything. Everything went fine, I've extracted some models and uploaded in blender,the next day when i tried to import other models i got this error(https://imgur.com/yy2SIu4) and the old models that i had stopped working. I've tried to reinstall everything, tried different versions of blender.. nothing worked. The version of the game that I'm using is the retail one, 7.3.5. anyone can help? Thanks in advance for the help!
-
So... I finally improved this terrifying flying beast, only to discover that I absolutely do not know how to bring it into game. So... Yeah, i guess i need a little help, if anyone interested. Please?
-
Hey. My nickname is Morvill. I want to show you examples of my work and offer my skills in level design (including creating, editing maps in Noggit and 3D models of buildings in Blender) I've been working at the noggit for 3 years already. Here are examples of my work, their scope depends on deadlines and prices: 1) Alterac. The time line between the second and third war. The creation was spent about three months. One of my early works.(Project: Noblegarden) https://postimg.cc/gallery/xvx72dx0/ 2) Gilneas. Revised version. Made according to the customer's technical plan. A week and a half is spent on work.(Project: Noblegarden) https://postimg.cc/gallery/k6yhx0s4/ 3) Stranglethorn Vale. Redesigned according to the customer's technical plan. At work spent a month. (Project: Tales of time) https://postimg.cc/gallery/1j7j8o3ec/ 4) Tanaris. Redesigned according to the customer's technical plan. A week and a half is spent on work. (Project: Tales of time) https://postimg.cc/gallery/1ehk4808k/ 5) Thousand Needles. Redesigned according to the customer's technical plan. A week is spent on work. (Project: Tales of time) https://postimg.cc/gallery/2kuqui3as/ If your project requires the creation of new zones, then contact me on Skype (schumaher_ghy) or Discord (Sir squirrel(Morvill)#5741). Also, you can find me in a discord on the channel Wowdev team. The price is negotiable. For large projects, prepayment is required.
-
Hi there I am wanna say first that I am very sorry if I happen to post in the wrong section but to my eyes this seem like the right way. I have currently tried a few editing thru out wow history. XVI32 . First model program I ever used. Now adays I want to change the new model of Undead Male HD back to SD model. I have now seen a lot of guides how to use Blender as this seemed to me like the method to do this. But yet so many questions remain. Can Anyone help me in this case? I do really only wish to see the old Undead Male character back in the game so that I can enjoy wow like I used to. If anyone happen to lay in with the file or so to say information I would very much appreciate your assistance. Have a great day. :-) OBS: We r talking live client Legion 7.3 I do not like the new character models.
-
Hello, i am currently looking for a guide to explain me, how can export items (like armor or weapon) from wow into blender and, after editing, export it back. Is it possible? I would like to target Dreanor extension. I have tried to google it and look through this forum, but unfortunately haven't found anything valid.
-
Version 1.0.1
588 downloads
Hi ! This tool takes the height coordinates of a .OBJ file and puts them into the .ADT file of the same name. Launch "run.bat" to convert all files in directory. Skarn made the original script & logic and I coded it in Java due to limitations of 010 editor scripting.- 4 comments
-
- 18
-
-
Nowadays import plugins for Blender can be used for importing the models and exporting them out of Blender. It is better to use this new software rather than tools demonstrated on the video. But the overall technique is the same.
-
 REMASTERED edition of WoW 3D models importing with using OBJto M2 music is too loud ... my bad
 -
-
Hey! Words can't express how hopeless I am right now. It seems like whenever I try to do something more complicated than dbc editing, NOTHING FUCKING WORKS! Basically, there's this model "Glaive_1H_Twilighthammer_b_01.M2": What I've tried to do is to take this model, change the middle part just a little bit in blender, export it, then mirror the whole model so it fits the other hand and export that too. Then convert the result into m2 and use it ingame. I've tried using both m2mod v4 and OBJtoM2, but m2mod would just crash on converting. OBJtoM2 would create the two m2 files and skin files for them, but the lefthand model appears as the good old blue-white cube, and the righthand model doesn't appear at all. Wonderful. P.S. I've also tried converting those two models (from OBJtoM2) to cata using jM2, but that didn't help.
-
Im working on a great release for you guys because of much help, I want to upload whole dalaran with detached parts each house, wall and tower without the ground. before i make all the stuff i wanted to test if it works and i did it well because i bumped into problem.As you can see i detached in blender this bigger part of the city and i want to make further slices from this what you can see on the picture.BUT i have a problem How to solve this problem? I also include the blender picture.with interiors. In the picture from outside i cant see the interior and i see through the model when i try to go inside i crash to desktop.Anybody? Edit: I also tried to took parts from instances and put it into noggit but i got crash when i go near my custom WMO-s (i put it into outdoor which was instance wmo part)
-
-
Hi guys, someone asked how to import models from HotS to blender, but this 3D software doesn't have a lot of plugins to do it. I'll share with you my researches and how I personally do it for me. Tools CascViewBlenderAddons for Blender (links in the section dedicated to this program)Heroes of the Storm game folder3DSmax 2012 and up (for the second technique)(if you take a lower version, you'll need an older plugin)This addon for 3DSmaxExtract models from the game First, you need to have the game installed. Open the Casc Viewer, click onGame Storage, and select your game folder. Now, explore the folders and choose the model that you want. In my case I'll take Uther. Now, right-click (or F5) on it to extract the model. Choose your folder and save it. Direct to Blender I've searched on the web after some plugins for Blender, but have not managed to make them work. Some are too old, others not compatibles, etc... The new M3 file format from HotS is a little bit different of M3 files from StarCraft, so SC modders are using a converter to make the models compatible with their tools..Heroes M3 To Sc2 M3 Converter Here's some M3 blender plugins, maybe you'll have more chance than me to make them work :This one is 5 years old, so I think it can possibly work with older versions of Blender.This second seems more complete and more up to date.This last is normally compatible with the 2.71 version.Sadly, no one was working for me (and I don't have time to test all blender versions with all plugins), so I've chosen the second solution. To Blender with 3DSmax 3DSmax part I don't really like this program for now, I have not taken the time to understand all the tools, but I can use it for simple things. So first, open 3DSmax. Click on the MAXScript pannel and choose Run Script. In the new window, you'll see the scripts that you can run. You can just drag and drop the M3 addon in this folder, or add it manually in your program folder (in my case " C:\Program Files\Autodesk\3ds Max 2013\scripts " ). And open it. Go to the right side of your screen, in the tools section. Switch to Utilities and click on MAXScript. Scroll down to see the new pannel called TM's M3 Import (v2.1) and choose Select file. Choose your file and open it. Once your file is selected, check what you want to keep in the model (bones, animations, etc...) and import it. Now you have your model. You can export it in *.obj file, click on the Autodesk logo and choose export. Choose a name and the file format to open in Blender later. Blender part Now launch Blender, go to import option and open your file. And here it is ! In my case, I have a blue pill (hitbox). Your *.obj will be like a *.fbx, it will keep all the informations like materials, bones, and animations. Just keep and remove what you want. And voilà. After that you can work on the modell as you wish. Let's paint Uther with abdalrahman9's technique. (all the red is the material color, not the weight paint) And I rework the face to fit well with the human model. I hope it was helpful, and good luck.