Search the Community
Showing results for tags 'noggit'.
Found 50 results
-
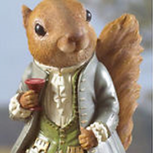
Hey. My nickname is Morvill. I want to show you examples of my work and offer my skills in level design (including creating, editing maps in Noggit and 3D models of buildings in Blender) I've been working at the noggit for 3 years already. Here are examples of my work, their scope depends on deadlines and prices: 1) Alterac. The time line between the second and third war. The creation was spent about three months. One of my early works.(Project: Noblegarden) https://postimg.cc/gallery/xvx72dx0/ 2) Gilneas. Revised version. Made according to the customer's technical plan. A week and a half is spent on work.(Project: Noblegarden) https://postimg.cc/gallery/k6yhx0s4/ 3) Stranglethorn Vale. Redesigned according to the customer's technical plan. At work spent a month. (Project: Tales of time) https://postimg.cc/gallery/1j7j8o3ec/ 4) Tanaris. Redesigned according to the customer's technical plan. A week and a half is spent on work. (Project: Tales of time) https://postimg.cc/gallery/1ehk4808k/ 5) Thousand Needles. Redesigned according to the customer's technical plan. A week is spent on work. (Project: Tales of time) https://postimg.cc/gallery/2kuqui3as/ If your project requires the creation of new zones, then contact me on Skype (schumaher_ghy) or Discord (Sir squirrel(Morvill)#5741). Also, you can find me in a discord on the channel Wowdev team. The price is negotiable. For large projects, prepayment is required.
-
When deleting an object. I presume a WMO of sorts the frustrum check still seems to be in place here. The chunks behind the object still seem to dissapear despite the object clearly being deleted. Does anyone have a remedy for this? In the screenshot there use to be a wall here. An idea I have... would I be expected to re-run mmaps, vmaps, etc with the patch implemented to fix this on the client side? Here is video showing this in real time camera movement: https://i.gyazo.com/9422fd2e443fb35a41a4e48b9c96f43d.mp4 What I dont expect to see: What I expect to see:
-
HI, I've been having some issues compiling the latest version of "Noggit QT". Is there anyone here who has a recently compiled this program that could send me a link? https://bitbucket.org/berndloerwald/noggit3 Thank you!
-
Hello all, My name is Peacy and myself along with 4 other coders are creating a custom blizlike quality server. This server has been straining us for quite some time but with each passing day we are nearing ever closer to completion! We are in need of Noggit zone developers. The zones we currently need to be done are Thousand Needles, Stranglethorn, and Westfall. This will be a paid position, and we appreciate our Noggit developers. If you are interested in making a zone for us please message me back here or contact me on skype (Priestchick). Thanks!
-
V2 - Benötigten Programme einrichten Es wurde ein Packet erstellt, in dem alles erhalten sein sollte, was wir nun für einen Start in einer guten WoWModding Umgebung brauchen werden und für das Tutorial bestimmt vorhanden sein muss. Ihr brauch im späteren Verlauf auch solche Umgebungen und daher gleich der Hinweis, haltet die Umgebung so "sauber" und geordnet wie es nur möglich ist um empfindlichkeitsfehler zu vermeiden. Die Installation wird zwar einige Zeit in Anspruch nehmen, aber dafür spart ihr diese später ein und verhindert zeitgleich Probleme, wie zerschossene World of Warcraft Dateien oder dass ihr die falschen Dateien bearbeitet bzw. die falschen Programme verwendet. http://www.file-upload.net/download-7667252/WoWModding.zip.html Ladet nun bitte dieses .zip Archiv runter und extrahiert es in eines der Oberverzeichnisse eurer Festplatten. Diese sollte: mindestens 70Gb freien Speicherplatz haben einen der folgenden Laufwerksbuchstaben haben: C, D, E, FErstellt euch gleich am besten den Modding-Ordner, der bei euch richtig wäre. Beispiel: C:\WoWModding\D:\WoWModding\E:\WoWModding\F:\WoWModding\ Wenn ihr F verwendet, so werden die Pfade im Rest des Tutorials überein stimmen; ansonsten verwendet bitte euren Hausverstand und nehmt euren entsprechenden Laufwerkbuchstaben! Ihr habt nun also einen Ordner namens wowmodding auf der Festplatte, der so aussehen sollte, wie auf dem Bild, wenn ihr die .zip-Datein extrahiert habt und alles hinein kopiert. V2.1. - Ordner (-chaos) Als kurze erklärung, erfährt ihr hier kurz was für was ist - also noch mehr Theoriewissen =) Client335aNoggit = Das "QuellWoW" für Noggit. Tut euch den gefallen und haltet ihn "clean". Noggit mag euch sonst nicht mehr.Client335aTest = Das "QuellWoW" für den Modelviewer und zum Patch testenClient Files = Alle aus dem Client extrahierten Dateien. So seht ihr schnell wo was ist bzw. wie so ein Patch aufgebaut ist.Projects = Der Ordner, der alle unsere Projekte sindTools = Anwendungen und nützliche Sachen, die wir in den Tutorials verwenden werden. ( Im späteren Verlauf, werdet ihr merken das immer mehr dazu kommen wird, so habt ihr dann schon ein "Schrankfach") Nun eine Liste von allem, was sich so in Tools findet, auch wenn es nun etwas verwirrend sein wird - sobald ihr etwas fortgeschrittener seit, wisst ihr schon was damit anzufangen ist: 010Templates = Templates für den 010 Hex Editor um einfacher hex-Modifikationen an Dateien vornehmen zu können.ADTAdder = Ein Programm um neue ADTs aus einer Quell-ADT zu erstellen.AllWaterGui = Ein grafisch gestalltetes Programm um das Wasser auf einer ADT zu bearbeiten.BLPConverter = Konvertiert PNG in BLP Dateien und umgekehrt.BLPShellExtention = Zeigt BLP Dateien als Thumbnails (kleine Vorschaubildchen im Ordner).CMD = Einige notwendige CMD ProgrammeDriveLetter = Installationsdateien für dieses Packet. Setzt die Konfigurationsdateien of den von euch verwendeteten Buchstaben.FuTa = Ein ADT alpha-map Importier- und Exportierprogramm. Nützlich, um schnell zu texturieren.MPQEdit.1.1 = Verwaltet MPQ Dateien (öffnen, extrahieren, erstellen).MPQEdit 3.2 = Verwaltet MPQ Dateien (öffnen, extrahieren, erstellen).MyDBCEditor = Ein Modifikationsprogramm für DBCsNoggitSDL = Ein ADT-BearbeitungsprogrammNoggit1.4 = Ein weiteres ADT-Bearbeitungsprogramm, sofern gedownloadedProjectTemplate = Eine leere Ordnerstruktur, von der aus ein Projekte gestartet wird.Taliis = Ein Programm um WoW Dateien zu modifizieren. Wir nutzen es um WDTs zu erstellen.WoWModelViewer7 = Guckt euch M2 und WMO Objekte an und nutzt dieses Programm um sie in Noggit zu importieren V2.2 - Moddingumgebung einrichten Nachdem ihr die Dateien entpackt habt müsst ihr die folgenden Schritte befolgen, um alles zum Laufen zu bekommen. >>> Öffnet den folgenden Ordner F:\WoWModding\Tools\DriveLetter >>> Öffnet den Unterordner, der zu eurer Festplatte passt und kopiert den enthaltenen Tools Ordner in den folgenden Pfad. Überschreibt hierbei alle vorhanden Dateien. F:\WoWModding Dies kopiert die Konfigurationsdateien einiger Anwendungen, so dass diese nun auf euren Laufwerksbuchstaben zugeschnitten sind - wie gesagt - sofern nicht F, bitte mitdenken! >>> Kopiert den Inhalt von einem sauberen (sprich originalen) World of Warcraft Stand 3.3.5a in die beiden Client Ordner. Schiebt da nicht einfach nur einen World of Warcraft Ordner rein: das wird nicht funktionieren, siehe Bild - so sollte es aussehen: F:\WoWModding\Client335aNoggit F:\WoWModding\Client335aTest >>> Öffnet nun die folgenden Anwendungen, um zu sehen ob alles geht. F:\WoWModding\Tools\NoggitSDL\noggit.exe F:\WoWModding\Tools\WoWModelViewer7\wowmodelview.exe V2.2.1 - Die MPQs zerteilen/extrahieren Um dies zu vermeiden extrahiert alle MPQs in der nachfolgenden Reihenfolge in ClientFiles und überschreibt immer brav vorhandene Dateien. Alle MPQs, die in ClientFiles müssen sind. Aus dem WoW/Data Ordner (Nehmt dazu Client335aTest): common.MPQcommon-2.MPQexpansion.MPQlichking.MPQpatch.MPQpatch-2.MPQpatch-3.MPQAus eurem lokalen Ordner (deDE, enUS, enGB, ruRU etc.): locale-enUS.MPQexpansion-locale-enUS.MPQlichking-locale-enUS.MPQpatch-enUS.MPQpatch-enUS-2.MPQpatch-enUS-3.MPQ >>> Öffnet dazu MPQEdit 3.2 aus dem Tools Ordner. >>> MENU > File > Open MPQ >>> Wählt die erste Datei ganz oben (links!) und öffnet sie (In diesem Fall ist es die common.MPQ im WoW/Data Ordner. Zur erinnerung nehmt die Pacthes aus Client335aTest) Wählt die erste Dateiliste von oben aus und öffnet sie. Es ist die common.mpq im WoW/Data Ordner. Nehmt einfach die MPQs aus Client335aTest. Links seht ihr die Struktur in der MPQ. Wählt hier den obersten Ordner aus, wie im Bild gezeigt. >>> MENU > Operations > Extract Setzt alle Optionen so, wie es im folgenden Bild gezeigt wird. Der Pfad sollte auf das folgende Verzeichnis zeigen: F:\WoWModding\ClientFiles Der MPQEditor wird nun alle Dateien aus dem Verzeichnis in das Zielverzeichnis kopieren bzw. extrahieren. >>> Wiederholt das mit allen MPQs aus den Listen oben. Jetzt habt ihr die richtigen Dateien immer zu Hand und könnt sie auch mit eurer OS-Suchfunktion über den Dateinamen finden. Ihr solltet die BLPShellExtention aus dem Toolordner installieren. Es wird .BLPs eine Miniansicht hinzufügen, was nicht mit "Ansicht->Große Symbole" gemeint ist, da man .blp's unkonvertiert nicht sehen kann und somit das ganze ein Stück leichter macht. So könnt ihr Bilder und Texturen schneller finden. Sollte dann so aussehen: >>> F:\WoWModding\Tools\BLPShellExtention -> BLPView1.2.exe Nun sollte alles einsatzbereit sein. Im nächsten Kapitel wird eine Testserver aufgesetzt. Wenn euch das nicht interessiert überspringt es einfach und lest im übernächsten nach, wie wir unsere erste Insel in Noggit bauen. Ich möchte zu bedenken geben: Auch wenn ihr einen Root-Server habt, ist ein eigener Lokaler Server in sofern praktisch, das ihr damit wahrlich testen könnt. Und sollte mal was schief rennen, könnt ihr diesen Server schneller wieder neu aufsetzen als einen Root!
-
Hi there ! As I'm not quite sure to know where the problem originates, I'm posting in misc. I'm actually following Amaroth's english tutorials and I just started painting mountains and beach of a small test island. On Noggit (Version compiled from repo a week ago), it looks like this : But in game (WotLK), it looks like this with low shadows : And like this with all parameters to ultra : The first screen displaying noggit was made AFTER I saw the problem, so as you can see, most of the textures are fine, but there are still some stripes on the left that were definitely not there when I painted it, and the chunk near the circled cursor got pretty weird too. Maybe it's a very simple problem I don't know (But I hope so !). I tried to search for it but I didn't find anything, so if you have any idea, please let me know.
-
Greetings, I'd like to ask you of help in spawning buildings with interiors in it. I mean spawning interiors serverside or putting them inside in Noggit by hand is quite tidious. From what I know there are interior sets made by Blizzard that can be seen in Modelviewer however I have no idea of how to use them. Is it even possible? If yes, I beg you for an advice Thank you, Krysik [Solved]
-
Posting what I did on modcraft here as well :). I don't post much on the forums but I do however read quite a bit, the one thing I am getting a strong sense of, is how people want to move past WOTLK and onto the later expansions. (I am one of them ). I am also noticing at least 2 reasons as to why people have not so far. 1. To many different tools are needed to do so, alot of different tasks are needed to be done by to many different applications, when, in reality, the process could be simplified and integrated into 1 program (Noggit). For Example: Instead of using futa and adt adder then the offset fix and gruul me (4 different applications) to get your first map up and running. You can have a "Create New Map" button in noggit. When clicked it would ask you to input the map name, base texture, if you want it covered in water and what kind of water, and the general height of the adt. After all that is put in you hit a create button. Then a progress bar will show up as noggit automatically creates the adt files, does the offset fix, creates the wdt and wdl files all in one swoop. All that is left is for you to do the Map and Area DBC for it to be recognized. We have the source for all these programs if I remember correctly? You would still need Futa for alpha maps but the other 3 programs you would not need anymore. Basically intergrate the tools we are already using into 1 program instead of being split into many different programs. Gruulme would still have its use as well outside of noggit for if you change the size of your map or something like that, but I am sure that could be intergrated as well. I think you get the idea . 2. The other reason I think people aren't moving past wotlk is the server emulation. To be honest the other cores no matter how you slice it are not up to snuff with wotlk, which is no suprize. To be honest I could careless if everything is spawned and 100% blizzlike gameplay. I would rather have the empty sandbox where nothing is spawned but all the systems like say (spells, professions, questing, talents etc... etc..) are working 100%, spawning and such can come later (as that really is a ton of work). Besides, we are here to create our own gameworld inside the world of warcraft universe, why would we need the blizzlike spawns and encouners to be blizzlike scripted? No idea how to fix this one, besides just waiting . Those are the 2 main things I have noticed. We have an ADT converter, a wdt converter which can convert and create the necessary files needed for maps to be recognized in WOD (ADT, WDL, WDT). We have a M2 and WMO converter which can convert down to WOTLK or WOD. Which means we have the ability to read those specific files and convert them down and up correct, with the sources on how to do so? So if all that information and such is integrated into noggit we should be able to read and write adt files in noggit for later expansions (WOD mainly). We can use the info from the M2 and WMO converter to be able to render those objects in noggit (cause it would need to know how to read the M2 and WMO files). So that convers the maps and all the objects in that version of the game. We have the information, all that is left is to make it a reality right? Maybe its just me lol, I just believe all this stuff could be simplified greatly to make things quite a bit easier for everybody to do, so wow modding as a whole, can move past wotlk. I have actually tried to learn how to code in c++ (spent quite a lot of time on it actually) just so I could help with these things or do them myself, just, it didn't stick very well so it is gonna be quite a long time before I can be of use with these things as I need to learn it. Hopefully this helps with giving the people that can code, the ideas and thoughts needed to help things move forward? I would really love to see things step forward, as a whole.
-
Commissions closed. I don't believe they will be ever opened again. What is this about Hello there little whelps, there are apparently quite a lot of people who are willing to pay for maps, but they want to have real finished map, they don't want to just hear some empty promises. I am willing to sell some maps I have already finished before (unless they were already bought by someone), and I'm also accepting commissions - you can hire me to make some project for you. A few general rules follow though: Comissions will be sold to only one person, and whoever next would like to buy them would need to have a permission of the one for whom the map was originally designed/sold. Thats in general possible when projects don't cross their interrests for some reason (different language, game style...). Map costs (very) roughly around 750 CZK (czech crowns) per ADT of ground (bottom of seas around isles don't count or are way cheaper). Google your currency to CZK conversion rate. 750 CZK is about 28.75€ or 32.75 USD now. Payments are to be sent on my Paypal account. Currency used there is up to you, I will have to make conversion to CZKs anyway, so it doesn't matter what kind of currency you send. Currency conversion fee is my problem and I won't add it to your payment. I will send you map after receiving payment, not sooner, and when its done. We can discuss sending WIP version for part of final payment though (usually % of price based of approximated % of work progress already done), if you need it for developing server side stuff. My newest maps can't be opened in Noggit, they cause crashes. Its a protection against leechers. I can tell you how to get rid of it ofc, so you'll be able to edit my maps after buying them, if you want to. I won't share that knowledge here though. Patches will contain needed DBCs, WDT, ADTs and all retro-ported or custom textures and models used. I will do all client side work - Noggit, light settings, ground effects, water and so on. I can also create custom M2/WMO models, if really needed. I work only on WotLK. At least for now. However, you can (hopefully) upconvert my maps to newer client versions, I suppose, but I can't provide you any assistance with this. I won't generate server-side maps for you, but I can help you with that by guiding you. Maps which are not done as commissions for someone are free to be bought by anyone, unless someone gives me offer to pay something I would call a really good price. In such case we might discuss closing sale of that map. Please, no strict deadlines. I am sometimes a busy person and sometimes I just don't want to work in Noggit. Its a very bad idea to try to force me to work in such times, results tend to be just way worse than they would have been otherwise. If we agree on any sort of deadline, I will try to make map on time ofc, just keep on mind that all kind of things can happen. Apart of deadlines you may want to try to put on my head, I ALWAYS keep my word and don't just break deals, at least as long as you keep your part of any deals we make. If I say I won't sell your map to anyone else, I won't, and I will help you as much as possible with protection against possible patch stealers (just remember - there is nothing like an absolutely impenetrable security measure). I always send my maps ASAP after payment is received. You can count on me when it comes to such things, and I think I am a person known around well enough to be considered trustworthy. I will make the very basic minimap and world map working for you if you want me to, but I preffer to not draw anything. I am just a beginner when it comes to painting maps or any 2D hand-painted stuff in general. But I can do it. I can create custom 3D models for you, both WMOs and M2s. But for now no animations/particle effcts/lights (so no creatures as well). And I am not importing stuff from different games, only creating new, custom stuff - stationary doodads and items or buildings. You can actually hire me just to make models for you, no problem with that, and I am also learning to hand-paint custom texture now as well. If you are not 100% sure wheter you will be able to pay me, please, don't waste my time. I've always got different things to do, so make 100% sure you are able to keep your side of agreement. If I get sense that you are just wasting my time, I will cut you off. No weeboo projects. I am not a fan of anime. If you are interrested, contact me via PM here or via Skype striker159753. Some previous projects to show off My personal project from 2014-2015. I've been modding WoW since summer 2011 - there were multiple projects before this one, but I don't think they are worth mentioning in comparision with this and the following ones. Arathor RP still exists, but has moved to Mythia map (below). Following map was already sold.: My current personal project (although no longer owned/led by me, I have retired), opened in 2016. Still running. Some parts of map were not done by me though (most of those people tend to not like :P). As this map was finished by some of my former collegues, I will never offer this map for sale, unless they give me a permission.: Both of following videos are from Erutia project. The first is a full making of video (well, not really full, that would be either too long or too fast to watch, but I've put parts of every step of progress there), the second is a trailer (with some speed spawning stuff included as well).: Comissions I've already finished, they are not for sale anymore.: WMOs I'm creating and releasing for free use.:
-
Noggit user manual - video version. New videos will be added later. Check my YT channel for more! Repo here: https://bitbucket.org/berndloerwald/noggit3/overview
-
Potřebné programy Noggit, doporučená verze je SDL 1.4 nebo co nejnovější beta. SDL 1.4 je poslední oficiální release. Oproti nejnovější betě má řadu zádrhelů, ale je věcí autorů Noggitu, ne mě, říct, kdy je nová verze hotová, připravená k oficiálnímu vydání a kdy ji mohou uživatelé začít používat s klidným vědomím i na ostré projekty. Potřebné počáteční znalosti Předpokládá se, že jste si prošli Obecný přehled pojmů a systému hry, Vytváření a editace MPQ archivů a Úvod do WMV. Příprava projektu, konfigurace Pokud chcete používat Noggit, budete potřebovat upravovat řady věcí (WDT, WDL, DBC...) a je možné, že budete chtít také používat různé vlastní modely či modely z vyšších datadisků, a to ať už hned od začátku, či někdy v budoucnosti, až se více rozkoukáte. Důrazně proto doporučuji, abyste si vytvořili složku, ve které budete mít (jen) věci od svého projektu. Do této složky si okopírujte složku Data ze svého herního klienta. Tento krok byste nemuseli dělat, ale vřele doporučuji, abyste měli oddělená data vývojářská a data herní. Pokud chcete rozjet vlastní server, doporučuji si pak ještě udělat celou další kopii herního klienta, která bude sloužit pro testování patchů (takže budete mít klienta s herními patchi, klienta s vývojářskými patchi a Data složku pro vývoj projektu ve složce projektu). Ne každý má samozřejmě tolik místa na disku, ale pokud jej máte, nešetřete jím. Dále doporučuji také vytvořit si kopii WMV, který bude napojen na vaše Data v projektu, rozhodně v případě, že hodláte přidávat obecně jakékoliv modely, které nejsou v blizzlike WotLK herním klientu. Pokud si vystačíte jen s blizzlike klientem (což ze začátku z pravidla ano), WMV vymezený pro Noggit moc nepotřebujete. Dbejte jen na to, aby měl Noggit skutečně všechny cesty ke všem MPQ nastavené do složky ve složce projektu, ne do vaší hry. Pojďme už na samotný Noggit. Otevřete složku s ním a v ní najděte soubor noggit.conf (někde najdete noggit.temp.conf či něco podobného, v takovém případě jej přejmenujte na noggit.conf, a pozor, ať to není noggit.conf.conf (můžete ověřit ve Vlastnostech souboru)). Noggit.conf otevřete v poznámkovém bloku. Path nastavte na cestu ke složce, ve které je složka Data s MPQ, které má Noggit používat. Tedy cesta do složky vašeho projektu. Složky se v cestě oddělují zpětným lomítkem \, nezapomeňte, že u cest do složek musí být toto lomítko i na konci cesty. ProjectPath je cesta do místa, kde budou ukládány všechny vaše upravené soubory, tedy upravené mapy a DBC. Ta může vést obecně do jakékoliv existující složky, ale doporučuji ji dát stejnou jako je vaše Path (tedy ideálně do složky projektu). I tato cesta musí končit na \. Následuje cesta ImportFile. Zde pozor, u Noggitu SDL 1.4 jde o wmvLogFile cestu. U nového beta Noggitu jde o cestu k souboru Import.txt. U beta Noggitu ji buďto zakomentujte (napsáním symbolu # před ní), nebo do ní dejte cestu k souboru Import.txt ve složce s Noggitem (můžete takhle napojit několik Noggitů na jeden Import.txt pokud chcete). Jelikož jde o cestu k souboru, NESMÍ končit na \. wmvLogFile je cesta k souboru log.txt ve složce userSettings ve složce vašeho WMV, který chcete pro práci s Noggitem používat. Propojení Noggitu SDL 1.4 a WMV nefunguje jak má, takže nemá moc cenu jej vůbec nastavovat. U beta Noggitu tuto cestu rozhodně nastavte, bude se vám totiž toto díky Bohu již opravené propojení moc hodit. FarZ nechte na 1024. Můžete jej zvýšit, ale výchozí 1024 je stejně maximální viditelnost ve WotLK s Ultra detaily, takže takový dohled nemívá moc smysl. Pokud máte pomalý stroj, může se vám hodit nastavit nižší hodnotu. U beta Noggitu najdete ještě TabletMode, napište do něj true jen v případě, že máte grafický tablet, jinak tam nechte false. Nyní můžete zkusit spustit Noggit. Pokud vám spadne s tím, že mu chybí nějaký .dll soubor, dejte do Googlu náze .dll souboru, stáhněte si jeho nejnovější verzi pro svůj OS a umístěte jej do složky s Noggitem. Pokud vám Noggit spadne a nic nenapíše, otevřete log.txt a zkuste si projít výstup, zda vás tam nepraští do očí nějaké chyby (většinou tam najdete spam o tom, jak se MPQčka nepodařilo otevřít, což značí, že jste zadali špatně vaši Path). Pokud nic nevykoumáte, nahrajte log.txt na Pastebin, stejně tak váš noggit.conf a buďto si založte vlákno s žádostí o pomoc, nebo kontaktujte někoho ze zkušenějších vývojářů přímo. Potíže s grafickou kartou V dnešní době má většina výkonnějších PC 2 grafické karty, jednu výkonnou a jednu úspornou. Pokud je toto váš případ, je možné, že vám Noggit sice pojede, ale bude vám hodně silně lagovat jakmile vejdete do mapy. V takovém případě jej zavřete, vlezte do nastavení své grafiky (pro majitele NVIDIE na příklad stačí zadat do startu NVIDIA a otevřít její ovládací panel). U NVIDIE klikněte vlevo na Spravovat 3D nastavení, vyberte kartu Nastavení programu, klikněte na Přidat, v dialogu na Procházet, vyberte spouštěcí soubor Noggitu. Pak překlikněte na Vysokovýkonný procesor NVIDIA v drop down menu, klikněte na Použít a máte hotovo. U jiných grafických karet bude postup snad podobný, případně dohledejte Googlem, co a jak. Pokud lagy neustávají, otevřete log.txt Noggitu a v něm najděte řádek píšící, které grafické jádro je používáno. Ujistěte se, že je tam to výkonnější. Pokud ne, něco jste udělali špatně. Pokud ano, máte problém, který dost možná nedokážu řešit (vyjma obecné a mnohdy nikomu nepomáhající procedury typu aktualizace ovladačů, OS apod.). Jak toto udělat u NVIDIE si můžete také prohlédnout v jednom z mých videí. Jak upravovat mapu Nebudu zde do detailu rozebírat, jak se Noggit ovládá. Od toho zde je uživatelský manuál, který jsem psal pro Noggit SDL 1.4. Beta Noggit má pár věcí trochu jinak a pár věcí navíc, ale na ty zvládnete jistě přijít sami. Co je pro vás důležité je, že pokud otevřete Noggit, budete nejčastěji chtít upravovat kontinenty (Continent), ostatní mapy asi jen zřídka. Malá rada, maximalizujte si okno Noggitu vždy před tím, než vstoupíte do mapy, aby se vám nerozhazovalo UI. Po výběru mapy se dostanete na obrázek mapy, uvidíte síť souborů ADT, tedy jednotlivých dlaždic, ze kterých mapa je poskládána. Klikněte někam do mapy a tam se objevíte. Jakmile jste v mapě, stiskem klávesy H si zobrazíte ovládání. To vám, ve spojení s manuálem, co jsem odkázal, a pokusem-omylem, musí stačit k naučení se, jak se Noggit ovládá. Důrazně doporučuji projít si skutečně vše, protože narazíte na spoustu drobných vychytávek a klávesových zkratek, které vám mohou hodně usnadnit život. Možná někdy udělám videjka o ovládání Noggitu, ale myslím, že alespoň zatím jsou zde vyšší priority a že nejsou zrovna nutná celkově. Pokud máte SDL 1.4 (beta testu se týká také, ale ne všechna videa), věnujte zvýšenou pozornost mému FAQ. To je v (mé nedokonalé) angličtině, a jelikož tato série tak trochu předpokládá, že někteří její čtenáři s angličtinou nemusí až tak moc kamarádit, rychle jej zde shrnu. U 1.4 vždy ukládejte celou část mapy, kterou se chystáte teď nebo v budoucnosti upravit, najednou. Když stisknete klávesu M, uvidíte znovu ADT mapu. Bíle jsou ohraničená upravená a s upravenými sousedící ADT - ta všechna budou uložena jako upravená, jakmile stisknete ctrl+s. Dbejte na to, abyste vždy ukládali stejná ADT (tedy ne že jednou uložíte východní Westfall a po druhé západní) a abyste vždy ukládali úplně všechna. Pokud tak neučiníte, narazíte na duplikace modelů. V menu Assist najdete funkci Clear duplicate models. Ta není v 1.4 úplně dokonalá, doporučuji ji použít v beta test verzi. Pomůže vám vypořádat se s případnými duplikacemi modelů, ke kterým dojde, pokud v SDL 1.4 nebudete ukládat mapu vždy pohromadě. Dále, v SDL 1.4, vždy restartujete aplikaci poté, co uložíte mapu. Nikdy neukládejte nic 2x během jednoho spuštění aplikace. Dostanete duplikace a ztráty modelů. U SDL 1.4 udržujte vždy na všech chuncích plné všechny 4 sloty na textury, jinak budete dostávat v mapě ve hře crash (jak toho docílit se můžete podívat ve videu o 0023:007B31F8). Beta test tento bug nedělá a dokonce jej i opravuje. Beta test také nemusíte restartovat po každém uložení. V obou verzích si musíte dávat pozor na to, abyste neklikali nebo nepřetahovali nástroji do děr v terénu - jinak dostanete skvrny textury všude kde nemá být, díry náhodně rozházené po mapě apod. Nicméně beta test už alespoň nevytváří duplicitní díry v terénu u nástroje Holes. Malé upozornění ještě, beta test na rozdíl od SDL 1.4 správně kopíruje právě otevřené M2 i WMO modely z napojeného WMV. Stačí model zobrazit ve WMV a v Noggitu dát shift+c nebo alt+c. A poslední věc, aktuální beta verze vyhazuje z paměti ADT, na kterých jste dřív byli, ale už jste z nich odletěli, aby Noggit nepadnul při průletu velkou mapu na přeplněnou paměť. Aktuálně však takto vyhazuje z paměti i upravená ADT, takže přijdete v takovém případě o všechnu práci, než tedy odletíte někam přes půl světa, uložte změny. Jakmile uděláte změny, které jste chtěli, uložte je přes ctrl+s. Ve vaší ProjectPath se objeví složka world, v ní maps, v ní najdete složku s názvem mapy, a v ní veškeré upravené soubory. Pokud chcete, aby se tyto změny projevily ve hře, vytvořte si své vlastní MPQ a do něj vložte celou tuto složku (takže aby v MPQ byla stejně složka world, v ní maps, v ní složka s názvem mapy a v ní soubory). MPQ pojmenujte patch-(něco) kde něco je jen jedno písmeno bez diakritiky a vložte jej do složky Data vašeho herního klienta. Spusťte hru a změny by měly fungovat. Jak udělat dobře vypadající mapu Podle zásad kvalitního level designu, ve velké zkratce. Určité postřehy dávám dohromady ve své YT sérii, která je na rozdíl od FAQ i v češtině. Zde tyto věci nemá smysl rozepisovat, lepší je názorná ukázka. Je zde samozřejmě více věcí (např. jak mapu zvětšit, zmenšit, nebo udělat úplně novou), ale o tom někdy příště.
-
First of all, why the heck do I even bother with something what seems to be so basic? Well, apparently it is not, because there are a few tips and tricks which aren't very commonly known, at least beginners don't know them and there's no tutorial really describing them. I will also link my simple WIP tool which can be very usefull for you here. I will start with things you probably do already know, if that bothers you, just skip to the last heading. First of all, how can we get models into our map in Noggit? A short list of possibilities: Ctrl+c and ctrl+v. No magic hidden here. Import from MV. Import from a text file (Import.txt). Import from MV MV is a model viewer. WoW Model Viewer is an application which enables you to browse WoW models. Great thing, but here comes a problem - current Noggit's import functions aren't compatible with quite a lot of WMV's versions. As far as I know, importing WMOs in general tends to work. In order to import models from WMV, simply change ImportPath in noggit.conf, so it points to log.txt file in userSettings folder in your WMV's folder. An example follows.: ImportFile = D:\Modding\Projekty\Arathor\WMV\userSettings\log.txt When you have this set, you can simply open a WMV, select a model, then go to Noggit and shift+c to import M2, alt+c to import WMO. There were slightly bugged versions of Noggit where both shortcuts actually imported M2, keep this on mind please. The newest version should have this fixed by now. If your import functions don't work (mostly M2 tends to not), you can try a different version of WMV. Version which is definitely compatible with Noggit's import function for M2s can be downloaded on Modcraft.: http://modcraft.superparanoid.de/viewtopic.php?f=48&t=4797 The problem is, that this version is really an ancient one, and tends to crash frequently, especially when it comes to retro-ported stuff. Import from text file Import.txt is a file located in Noggit's installation folder. It contains paths to models separeted by line breaks. You can delete models from here simply by opening a file and deleting them. To reload a file, just deselect any model you may have selected in Noggit and go to Assist menu, choose To Text File function, and here you go, Import file is reloaded. If you have any model selected while clicking on To Text File button, its path will be written at the end of the file. This can be very useful when you need to copy a model from different map, or when you need to copy multiple models. To acces list of models in your Import.txt, simply go to Assist menu and click on From Text File. Then you can just start clicking on model names and models will appear on your mouse cursor or in model you have currently selected, or on selected coordinates, if Auto select mode in Edit menu is turned off (does anyone even use this thing?). So, why this tutorial? Where are those secret tips? Yep, its a little bit strange to write them at the end of tutorial which was supposed to be dedicated to this, but I needed to explain stuff above. Import.txt is actually quite a powerful thing to use, as long as you can get list of models you want to import into Noggit, separated by line breaks, and filter them. Such lists do exist in WoW - they are called listfiles. In each MPQ, you can find (listfile) (as long as it wasn't made as listfile-free MPQ). (listfile) is a list of all file paths to all files in MPQ. And we will make a good use of this. First of all, download my Toolkit. Its a WIP application and poorly written, I've got to admit, but it works for what we are going to do with it absolutely fine. There's also a simple .bat included.: https://www.dropbox.com/s/hh8i859hb9ebxve/AmarothsToolkit.rar?dl=0 Open your WMV. Go to File menu and select Export textures... option. In new panel which appears, make sure that Path preserved option is checked. Then just browse M2s. Everytime you find some you want to use, just click on Export all button in panel which have appeared. In the end, you will have model files in Export folder in WMV's directory, and they will be all in paths into which they belong. Now, you have basically two options. You can either place cleanup.bat script into Export folder and run it. It will delete all .skin and .blp files in all directories in Export folder. If you want to change list of extensions which should be deleted, simply right-click that cleanup.bat, click on Edit and you surely will figure out how to change it on your own. Then create a new, empty MPQ and place all folders in Export directory into it. The second option is skipping whole cleanup.bat part and continuing to another paragraph of this tutorial. When you have any sort of MPQ with (listfile) which contains files you don't want to use in Import.txt (like BLPs, SKINs or maybe even more stuff, it may be your server's patch you are giving to players or whatever else), you need to clean that (listfile) from all things you don't want to have there. To do this, just extract (listfile) from that MPQ and place it whenever you like. Then run my Toolkit application and set extracted (listfile) as input file. For this purpouse, you will want to use cleanup filter, which is that big panel on the left. Select extensions you want to keep in listfile (most likely .M2 and Root-only .WMO). You can also select path prefixes to keep only models from certain directory, for example, you can keep only files from World folders. You can also modify filters by using those 2 buttons and text input under filters, so you can add filter to World\Expansion02\ directory, for example. For more info, follow a Manual. When all your settings are done, just click on Cleanup Listfile button and save cleaned listfile whenever you want. If you have made a MPQ which already contains only M2 files, its (listfile) will, obviously, contain also only M2s (and (listfile) and (attributes) most likely), so you can basically use that (listfile)'s content without even filtering it by my Toolkit. Now just open that cleaned and filtered listfile, press ctrl+a (or select just some particular models you wanted to use), ctrl+c, open Import.txt, ctrl+v, ctrl+s, use To Text File function in Noggit to reload import file and you are done, you have your models in Noggit. This all can seem a little bit complicated, but when you learn how to do this and won't need to look any manual up for that, you will actually be able to quickly get lists of even hundreds or thousands file paths and filter them by using my Toolbox to get files you wanted, the only problem is exporting model files via WMV, if you need to do that (so, if you need to select just a few certain models rather then just use whole folder for example). One final tip. You can also create a (listfile) of all file paths in WoW and then just always get only models from some certain directories by using my Toolbox. Lets say you want all World\Expansion02\Coldarra\ models. If you already have prepared merged (listfile) of all WoW files, my Toolkit is actually very fast and easy way of getting all those models directly into Import.txt. Just open Toolkit, choose merged (listfile) as an input file, write World\Expansion02\Coldarra\ under filters, click on Add path prefix button, make that filter checked, click on Cleanup Listfile and... done. And one now really final tip. Extensions filter may be actually used also for ends of file names (like keg.m2, instead of just .m2). Path prefix filter can, on the other hand, be also used for name prefixes, like World/Custom/am_. Sadly, its (for now) limited for use on only one directory. This will get all am_ files, but only in World/Custom/ folder. Both extension and prefix filters aren't case-sensitive.
-
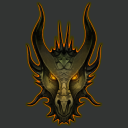
Hey there, I haven't been active for a while, mostly for personal reasons, though I've been visiting the site every day. I'm here to show you a map I made for quite a while, I used some new techniques in texturing and terraining hope you like it, also please read the story. Millennias ago, lived a mystical lone creature with the size and power greater than a titan's. They say his name was Mievak and it used to wander the universe searching for one of it's kind. One day after an endless search he finally found his mate,named Vuthinda. They lived in a small unknow planet where they built their home and dreamed about their future. But one day when the war between the Titans and Demons was at it's peak Vuthinda was caught in the middle of a battle, powerless and by the heat of battle she died.Heartbroken and depressed Mievak killed and enslaved both titans and demons, hoping in vain to somehow ease the pain which was tearing his heart apart. None were to stand his aching wrath. But his untold pain was soon to come to an end, when one day he met an Old God who would end his agony by killing his pain causes, thus wiping his dearest memories leaving but a mere image of his loving wife. Mievak soon came to his senses revealing his true self, a twisted beign, a dark corrupting creature hidden beneath his sturdy bones and soft flesh. Under an innocent look, under a pair of beautiful love-seeking eyes, he is there, ready to torment mortal's souls. He is waiting!
-
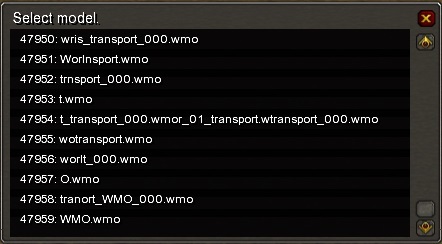
I show you two noggit errors, maybe someone know how to solve this. On picture one, there is something weird bugg, one chunk looks like turned into shadow cube. I tried to delete shadders, rise low the height everything but it doesn't dissapeared. Then I deleted the whole chunk but the shadow shade still there, lol. And it still appear in game. On the second picture my new noggit can't open texture palette, only open the exinting textures on the local adt-s can't load all the 65 side textures. I used old version of noggit to make my textures but its annoying to use 2 version of noggit. Any idea to fix this? If there isn't a solution for this I can make peace with this method.
-
I put doodads into a building in noggit, but the doodads ingame deisappearing when i step into the interior but the collision stay. Why are my doodads dissapearing
-
Hey! I wanted to make some changes to the original Eastern Kingdoms map on my Cata server. So, I made them in Noggit (on the WotLK version of the map, obviously) and I now have a wdt and a couple of adt files with the needed changes. Next, as I understand, I should upconvert them to Cata, but what should I do after? Do I just put those files into a patch? Should I somehow merge the original and the edited Azeroth.wdt? If there is a step by step tutorial somewhere, I'd be grateful for a link.
-
Couldn't find a better title.As you can see in the picture the water in the blizz maps, is tilted by an angle,when going down the hill, is there any way how I can do this in my custom maps? Thanks
-
WoW Error Message: (Attached Text File) WoW Error Message.txt
-
Version 3.0.0
241 downloads
Hey! I was really annoyed by having to restart noggit every time I changed the text file I imported models from. So, I made this import.txt, that includes every .m2 and .wmo file (except for shaders, skyboxes, spells and armor (includes weapons)) up to and including the currently known Legion files. It worked nicely, so I thought I'd share it.- 6 comments
-
- 2
-

-
- noggit
- leveldesign
- (and 2 more)
-
Hey! I have this weird problem: when I make a hole somewhere, noggit also adds like ten more all over the map (even on other adts). What's wrong?
-
Hey! The word "request" might be too harsh here. Its more of a pleading for someone to make a complete (from scratch to finish) up-to-date (I guess not using taliis) tutorial on making, editing and installing a custom map in noggit (sdl 1.4, which is the latest, I think), with screenshots and links. I hope someone reads this and goes "Oh, why didn't I think of it myself?!" and suddenly writes a beautiful tutorial I described.
-
Hey! Im editing the area around old Dalaran and I thought the lake is too small, so I lowered the ground and now I just have a hole in the water. How can I fill it?
-
V0.0 - Einführung & Vorwort Dein start mit Noggit V0.1 - Vorwort WoWModding ist ein herausforderndes und weitläufiges Gebiet. Genau deshalb werdet ihr nicht drum herum kommen, einiges an Text lesen zu müssen um wirklich hinein zu finden. Ich werde versuchen euch im Laufe des Tutorials alle wichtigen Infos zu geben, die ihr zum WoWModdingbraucht; nach Möglichkeit mit Bildern & wenig Text. Es wird hart sein - aber wenn ihr wirklich ins WoWModding einsteigen wollt, solltet ihr euch die Zeit nehmen und den Tutorials folgen. V0.1 - Inhalt & Index V0.0 – Einführung, Vorwort & Index V0.1 - Vorwort & Index V0.2 - Textformatierung V0.3 - Linksammlung V1 – Etwas Theorie wie WoW-Modding funktioniert V1.1 - Die MPQ Dateien V1.2 - Häufige WoW Dateitypen V1.3 - DBC Modifizierung V2 - Benötigten Programme einrichten V2.1 - Ordner (-chaos) V2.2 - Moddingumgebung einrichten V2.2.1 - Die MPQs zerteilen/extrahieren V3 - Der lokale Trinity Testserver V3.1 - Einleitung V3.2 - Benötigtes V3.3 - Serverumgebung ("Ordnerchaos 2.0") V3.4 - Serverstart ! V4 - Erste Schritte in Noggit - Die Insel V4.1 - Einleitung V4.2 - Übersicht in Noggit V4.3 - Wasser + Wasser erweitert V4.3.1 - Wasser hinzfügen (für die Tutorialkarte) V4.3.1. - Wasser erweitert - Einleitung V4.3.2 - Das Tool V4.3.2.1 - Vorgang Erklärung V4.3.4 - Fehler beheben V4.4 - Bodenbearbeitung V4.5 - Texturen (austauschen) V4.6 - Objekte (hinzufügen) (.wmo's / .m2's) V4.7 - Löcher V4.8 - Unpassierbarkeit V5 - Der erste Patch & InGame-Test V5.1 - Aus dem Projektordner eine MPQ machen V5.2 - DBC's zum Server hinzufügen V5.3 - Im Spiel zur Karte gelangen V6 - Texturieren mit dem vordefinierten 4-Schichten-System V6.1 - Einleitung V6.2 - Wie macht es WoW? V6.3 - Praktischer Teil V6.4 - Wie kann ich üben? + Tipps V6.4.1 - Realistisches denken V6.4.2 - Wiederholungen verbergen V6.4.3 - Trübheiten V7 - Eine Karte erweitern V7.1 - Einleitung V7.2 - Neue .ADT's erstellen V7.3 - Die .WDT Datei aktualisieren V8 - Neue Karte von Grund auf V8 - Einleitung V8.1 - Die .ADT's V8.2 - Die .WDT Datei V8.3 - Die .WDL Datei V8.4 - Die DBC Arbeiten V8.4.1 - Map.dbc V8.4.2 - AreaTable.dbc V0.2 - Textformatierung Drei Spitzen am Anfang einer Linie markieren eine Benutzeraktion (Hier solltet ihr ausführen!). >>> Öffne deinen Schrank und ziehe dir die Hose an, du musst gleich raus gehen. Ein Pfad auf eurer Festplatte wird in einer Linie und fettgedruckt sein: X:\WoWModding\Tools\DriveLetter\ Wenn ihr eine Option in einer Anwendung bzw. einem Programm auswählen sollt, so ist dies wie folgt markiert. Gehen wir einmal davon aus, dass ihr das Menu öffnen sollt und dort die Option "File" und dann "New" auswählt: MENÜ > File > New Hinweise & Informationen sind als Zitat enthalten Und nun lasst uns mit dem Tutorial beginnen, lets rock! 0.2 – Linksammlung Noggit 1.4 (Beta) [Klick] Decryption-Key: !7RhboXvz-sHIkOVDL-Ti2kg9PveZ0CEdsABE_Ursu6g .zip/.rar Passwort: "model-changing.net" (Ohne Anführungszeichen) WoWModding-Umfeld 2.0 [Klick] Decryption-Key: !qGzwvLeDB4C0grGMqd73-OHS7riOPUv8kZ-8AVlREJM .zip/.rar Passwort: "model-changing.net" (Ohne Anführungszeichen) Trinity-Umfeld [Klick] Decryption-Key: !ZBmMPj8qSwRl4fTzrQU0nV9EOC45GG7d1iPGFrUglZY .zip/.rar Passwort: "model-changing.net" (Ohne Anführungszeichen)
-
V1.0 – Theorie wie WoW-Modding funktioniert World of Warcraft ist ein Onlinespiel. Das bedeutet, dass ihr zwei Anwendungen braucht, um es zum Laufen zu bringen. Den Client habt ihr als Spieler auf eurem (Lokalen-) PC installiert und dann gibt es noch den Server, mit dem die Spieler sich verbinden, der die Spieler verbindet und die Inhalte liefert, die nicht im Client enthalten sind. Und seht ihr ein Bild welches abstrakt aufzeigt, welche Teile dieser zwei verschiedenen Anwendungen wir verändern können, um so das Spielerlebnis zu beeinflussen. Aber keine Angst, falls ihr nicht alles versteht; wir werden das nach und nach alles erklären. V1.1 - Die MPQ Dateien V1.0 – Etwas Theorie wie WoW-Modding funktionierAlle WoW Client Daten sind in MPQs gespeichert, welche ihr im Ordner WoWOrdner/Data/ findet. Ebenso findet ihr sie in den lokalen Unterordnern. Der Name dieser Ordner entspricht jeweils der von euch gewählten Sprache also z.B. deDE, enUS, enGB, ruRU, frFR usw.. Diese Dateien sind Archive, wie auch .zip oder .rar Dateien. Sie enthalten alle Dateien, die das Spiel benötigt. In etwa Modelle, Karten oder Texturen. Blizzard nutzt einige eigene Dateitypen, für die ihr spezielle Anwendungen benötigt, um sie zu öffnen oder zu bearbeiten. Aber auch mp3´s oder einfache Textdateien für XML oder LUA. Im Folgenden werde ich einige Dateitypen erläutern, die ihr im Client finden werdet. Um WoW zu bearbeiten müsst ihr diese Dateien extrahieren, sie bearbeiten und wieder in die MPQs packen, so dass der Client sie einliest. Auch das wird im Laufe des Tutorials aufgeklärt V1.2 - Häufige WoW Dateitypen Die folgende Liste zeigt euch einige WoW Dateitypen und erklärt kurz, wozu diese gut sind: (*).BLP - Blizzard Picture. Ist Blizzards eigenes Bilderformat. Du findest hier texturen, Karten, Interfaceelemente(*).DBC - DataBaseClient Dateien speichern die Daten für den Client. Ihr könnt sie euch wie Exceldateien vorstellen. Ihr habt Reihen und Spalten voller Informationen, die viele Sachen beschreiben. Zum Beispiel, welche Karten vorhanden sind oder welche Rassen, welche Zauber usw. vorhanden sind.(*).LUA - Sind Scripts in der Sprache LUA, die die Funtionalität des Interfaces beschreiben. Als Beispiel sei hier der Einloggen-Knopf angeführt. Was genau passiert, wenn ihr da drauf drückt ist per LUA definiert.(*).XML - Diese Dateien definieren, wie das Interface aussieht. Hier wird die Platzierung von Bildern, Objekten und UI Elementen festgelegt.(*).M2 - Modelle, wie Monster, Bäume und andere kleinere Sachen.(*).SKIN - Die Texturinformationen für m2´s(*).WMO - Weltobjekte sind größere Objekte, wie Häuser, Brücken oder ganze Städte und Dungeons, wie Sturmwind oder die Todesmienen.(*).ADT - Ein Puzzleteil einer Karte wie z.B. Azeroth. Jede Karte kann bis zu 64*64 Teile haben.(*).WDT - Ein Kartendefinitionsdatei. Diese legt fest, ob und wo ADTs auf der Karte existieren oder ob die Karte nur aus einem WMO besteht, wie es etwa Instanzen tun.(*).WDL - Eine niedrig auflösende Höhenkarte (Heighmap) aller ADTs auf der Karte. Diese dient dazu, weit entfernte Berge grob dazustellen.(*).Wav/mp3 - Jegliche Geräuche, wie Musik oder Effekte. V 1.3 - DBC Modifizierung Einige Worte zum DBC Modifizieren; DBCs sind Datenarchive, die relevante Informationen für den Client oder Server in rohform enthalten. Ihr könnt sie euch vorstellen, wie Exceltabellen. Jede DBC ist eine große Liste von Informationen, wie z.B. Welche Musik soll in der Region abgespielt werden, wie heißt die Region, welches wetter herrscht hier, welche Zauber gibt es