

Amaroth
-
Content Count
612 -
Joined
-
Last visited
Everything posted by Amaroth
-
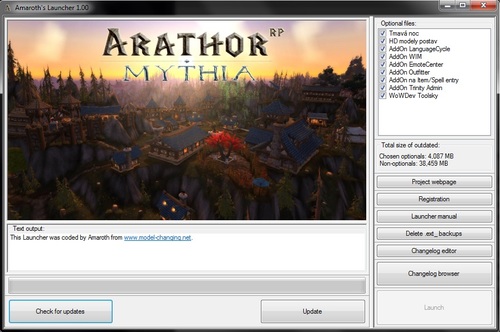
Version 1.1
203 downloads
About: This Launcher's main purpouse is to be easy, fast and convenient to use for both players and admins. Players get their client updated by clicking on one buttons, and admins don't have to spam news with patch releases, links to new versions of patches and so on. Launcher is nearly fully configurable and src is included, so you can do basically whatever you want with it. You can also fully translate your Launcher to your native language (or correct any posible mistakes I made since english ins't my mature language :D). You can also create multiple versions with different languages - all this without actually changing a src. If you happen to need to change src anyway, its written in C# (WinForms) and hopefully not too messy or too badly documented for you. Please note that this is the first version to ever be released (its actually a configurable remake of already released software, but... well). It is possible there are some unhandled exceptions or even bugs. I have been testing this tool for some time and there shouldn't be any real major issues, but one never really knows for sure. Keep a backup of your game client and don't set KeepBackups in config to 0 unless you are really confident this works correctly. Launcher is capable of following things: Deleting Cache folder. Removing (I use different word because optionally the most recent backups are being kept) outdated (or on web's filelist missing) MPQs in Data folder. Downloading any files specified in web's filelist into any specified local path in WoW's client folder. Unziping zipped folders (sadly, only zip is supported, rar, 7z and others not). Useful for AddOns. Dividing files into two categories - optional, and non-optional. User can choose which optional files are to be downloaded. All files can be organized into LinkedLists. If a file with a LinkedList is optional, it is an optional group. Player can either keep all files from an optional group, or none of them. Optional group can contain both files and zipped folder (AddOns). Self-updating, if a new version is released. Version system is based on one simple double-typed version number. Using different filelists. Which means you can have separated filelist (and files) for GMs/Devs and for players. Launcher also includes Changelog Browser (changelog entries have name, date, description and optionally a picture). There is also a Changelog Editor. To access it, you need to enter FTP login information. This serves for authentization of staff members, and also enables Launcher to upload edited changelog to FTP (so you don't have to put it there by hand). File downloading fully asynchronously, so users can browse changelog while files are being downloaded. Download speed, progress bar, percentage and stuff like that are being shown as well. Displaying of "hello image" which can for example be an image with some breaking news and stuff like that. How to configure: Rename your Launcher to whatever you want. Something like MyProjectsLauncher. Create a folder on your web where web side files will be kept. You can divide multiple things into multiple paths, but I'd recommend you to just have everything at one place. I'll call this a web's root folder (root folder for launcher stuff, not for web as whole, hopefully you understand me). Your web's root folder must contain file with current Launcher's version (I use launcherversion.conf). This file must contain only one double-typed number with . as a separator. Version of Launcher I'm releasing here is 1.0. You can change your Launcher's version in Core/Config.cs. If Launcher finds that value in launcheversion file is higher that its version, it attempts to update itself. Your web's root folder also must contain a zip file with a Launcher, its LauncherConfig.conf and optionally with its LauncherIcon.ico. I've named it Launcher.zip, again, you can rename it. Your web's root folder also should contain changelog.xml. If it is empty or isn't found, a new one will be created when you'll try to create a changelong in Changelog Editor. Add a hello image (in my case hello.jpg) into your web's root folder. This image will be displayed in Launcher's main window and will most likely be used by you for displaying some breaking news. Add a realmlist.wtf file into web's root folder, if you want Launcher to change realmlist of players to your server. Also add the most important file for Launcher to your web's root folder: a filelist. I've called it filelist.conf. You can have multiple filelists on your web and release multiple Launcher versions which use different filelists. By using this technique you can release a Launcher for developers and a Launcher for players, which use different filelists and thus can download different files. Set your filelist. Follow examples in my filelist which you can find in an example web root folder I've added into this release. Read instructions very carefully, as filelist syntax should be strictly followed. Launcher can handle some fooled up entrys, but not all, and if filelist isn't succesfully readen (or if any files mentioned in it are missing/paths to those files in a filelist are incorrect), Launcher will simply refuse to update a game client. Open a ChangelogConfig.xml. You'll need to change all data in Paths element - make really sure that those paths are correct. By doing this you'll connect a Launcher to your website. Pay especially high attention to FTP path to a folder where changelog.xml is, what it should look lile- You may want to change something in Main element. Its not very likely, but take a look there. MainWindow element contains WindowName subelement. You'll most likely want to edit this. ChangelogEditor element contains DateFormat subelement. If you want to change this, DO SO BEFORE YOU CREATE A CHANGELOG. Otherwise you will end up with incompatible changelog and Launcher. The rest of ChangelogConfig.xml contains names for UI elements and various messages Launcher can output. Create your own icon in PNG format, google some online PNG to ICO converter. Done. Test if everything works correctly and release a Launcher. Launcher is to be put into WoW's root directory and thats pretty much all. Making this application took really some time and effort, I had to learn a lot of things to make it work and plan to make more tools and apps for WoW development. If you really like my Launcher and want to give me at least something in return to support me back, my Paypal account is: jantoms@seznam.cz Its ofc up to you. Launcher is here for free, with source included. Do whatever you want with it. You may both keep using just my Launcher (and future releases, it runs on my project ad well, so I'll probably keep releasing bug fixes and so on) or create a new one based on this. I do realize that some parts of an app need improvement, let me know if you have any ideas or if you want to contribute to code of this public version. Contact: Skype: striker159753 Mail: Amaroth7@seznam.cz Repo on GitHub: https://github.com/Amaroth/WoWMod-Launcher- 5 comments
-
- 10
-

-
Its made for WotLK. I don't know if you can make this work for newer expansions. Maybe you can, maybe you can't, simply try it (I don't even know how Cata, MoP, WoD and Legion modding works). It should definitely work well for Vanilla and TBC though. Launcher just downloads files and folders into changeable local paths, so it should be fairly universal, at least for MPQ-using expansions for sure.
-
I've got a litte problem to understand what is your problem (or in fact, what do you actually want to achieve). You have NPCs which sometimes just stop and start going around with spawndist? Do they do so when walking between waypoints, or when they stop at waypoint? Do waypoints have delays (time for NPC standing there idle) set, or are delays 0? Do NPCs actually have spawndist set, or not? Quite a lot of questions... Maybe showing waypoint and creature data in database would be just better.
-
Yup, number of version (14, 15...) isn't the same as year (2015, 2016)... Confusing, but it is so.
-
I'd expect DK rune cooldowns to be hardcoded in client and in server as well. Lua is just for visualisation of CDs. Or am I wrong?
-
I gave up on trying to read and understand Alastor's post, so sorry if anything important was written there. (CZ: Gramatika a hlavně stylistika Alastore, promiň :D. To se nedá číst.) Its again so often forgotten SkillRaceClassInfo.dbc :D. There are 2 settings for this (plate - 293) skill there. The first one says that warriors and paladins can learn this skill, but only after getting level 40. The second one says that DKs can learn this skill with no level restrictions. DBC doesn't allow any other classes to get plate skill, because its not set as learnable in it for those other classes. This was ignored by TC until now, and it seems TC devs have decided to simply fix this as it was, in fact, a bug. To solve your problem, open that DBC, delete line 906 (you probably don't have to, just to keep it clean), change field #2 (ChrRaces) value to -1 (why the actual fuck is it readen as a float in MyDBCEditor??), field #3 (ChrClasses) value to -1 and field #5 (RequLvl) to 0. Field numbers are 0-based. This will mark plate mail skill as learnable for all race/class combinations since level 0. Done. https://wowdev.wiki/DB/SkillRaceClassInfo
-
Just to make sure, do you really have Visual Studio with C++ compiler installed? You need to choose C++ compiler by hand when installing Visual Studio, its no longer being installed by default. More at point 2 here: https://trinitycore.atlassian.net/wiki/display/tc/Windows+Requirements
-
It seems you haven't readen main post properly spectr. He wants to edit spell power/attack power bonus on spell's effect.
-
As far as I know you won't find spell/attack power effects in DBCs. Maybe world.spell_bonus_data table? Hopefully someone better informed than me comes around.
-
I doubt you can easily solve this, WoW waterfalls aren't really made to be used in such way. Blizz is always using only one fitting model in appropriate scale, putting more over each other will probably always cause similiar problems. The only other solution than simply using just one well chosen model is using models which are just emitting water splashing particles, but I really doubt such waterfall would look any close to something one would call good. You can also try to use more different models, not just spam of one. And make more sure that waterfalls actually start in rock M2, not next to/under it.
-
Beep beep :P.
-
Due to loss of internet connection I couldn't finish my answer to you, otherwise it would have been here for a few days already. There are 2 orientation systems for gameobjects in gameobject table at the moment. You can do basically two things. Either: Spawn a gameobject. Turn it with .gob turn command (TC admin is great for this). Done. Or you can: Spawn gamobjects. Execute following SQL query on your world database: UPDATE `gameobject` SET `rotation0`=0, `rotation1`=0, `rotation2`=SIN(`orientation`/2), `rotation3`=COS(`orientation`/2); Restart your server. Done. The 2nd method will rotate all your gameobjects to the way they should be oriented (so on-spawn orientation will be used). The biggest issue of the 1st method is that (at least on my a little bit outdated revision of TC) gameobject turn command doesn't change old orientation value which is no longer used, only the 2nd, new orientation values. The biggest issue of the 2nd method is that, apart from need of restarting server and not-seeing results immediately, it collides with the 1st method (objects turned by gameobject turn command will get turned again to orientation spawner was in when he spawned a gamobject). A (partial) solution to this would be: UPDATE `gameobject` SET `rotation0`=0, `rotation1`=0, `rotation2`=SIN(`orientation`/2), `rotation3`=COS(`orientation`/2) WHERE (`rotation2`=0 OR `rotation3`=0); Now, guys, tell me. Anyone. Why the actual FUCK is TrinityCore doing this. Releasing unfinished, malfunctional things. Redoing things which were WORKING. Fixnig things which WERE NOT broken. Its overengineering and utterly stupid in my opinion, and its not for the first time TC has done something similiar.
-
[Trinity] Problem with new skills (forbidden race/class combination)
Amaroth replied to Athris 's topic in Serverside
Nah, have you even opened SkillRaceClassInfor.dbc and took a look at its 144 row :P? Well, if you did, you likely just missed thats there's a 1st when 0-based, 2nd when 1-based field which contains (on that row 144) value 228. Thats an ID of wands skill (at least as far as I know, my Skill* DBCs are edited and translated and stuff like that a lot). Its even written here as well: https://wowdev.wiki/DB/SkillRaceClassInfo 1 - SkillLine - iRefID - Ref to SkillLine.dbc SkillLine.dbc contains main definitions of skills, and its IDs are used to identify skills in all other DBCs, DB tables, logs... So don't confuse IDs of skills with IDs of rows in DBC which just reffers to skill IDs. Btw, if that DBC was using IDs of skills as IDs of its rows, it wouldn't be able to contain multiple rows for the same skill. -
I've never done anything like that, would you mind guiding me a little bit? What about this?: https://github.com/Amaroth/WoWMod-Launcher
-
[Trinity] Problem with new skills (forbidden race/class combination)
Amaroth replied to Athris 's topic in Serverside
It really is in this DBC though.: 3 - ChrClasses - iRefMask - Bitmask to ChrClasses.dbc Field 1 (when 0-based) is an ID of skill. So, find rows which have wand skill skillID. There may be multiple such rows (however, in this case its just a one row - 144). Row 144 says that skill 228 is for all races (-1) and for 256+128+16 classes (5, 8 and 9 - priest, mage and warlock) learnable from level 0. The only one thing you need to do is include warriors into mask of classes which can learn this skill. Warrior's class ID is 1. So his value for mas is 2^0=1. So you need to change mask from 400 to 400+1=401. As simple as that. Thats all you need to do. Note that some skills can have multiple rows in this DBC and some of them can be there to include race/class combinations into list of combinations which can acquire this skill, some can do the opposite - exclude race/class combinations from list of combinations which can acquire this skill, or place some special restrictions to them. -
Doodad sets are being set by number keys (on keyboard, NOT on numpack) in Noggit when a WMO is selected. You can see wich doodad set is being used by that WMO in F8-toggled detailed info box. Doodad set 0 is a default set. If you want en empty building, simply find a doodad set which is empty (9 is like always completely empty), or use that default 0 one (commonly contains only things like torches, changeliers and such, and no real furniture and mess and stuff, but there ofc are exceptions). If doodads kinda refuse to disappear out of that model in game even when you have clearly set model's doodad set to something empty, it means that model has "hardcoded" which doodad set should is always enforced to be used (so settings in ADT file are basically ignored). In such (luckily rare) cases I can't help you.
-
The far easiest thing to do is just rewrite a single character (or small group of them). Like rewrite KK_STRMWND_ROOF_02 to KK_STRMWND_ROOF_C1, where that 0 > C would mark that texture as your custom version of it and 1 would mark... well, a number. You'd be able to make multiple such textures with similiar and at least somewhat descriptive names.
-
Object A - object which is supposed to be changed Object B - object from which you want to use texture The easiest way of doing this is simply exporting both A and B textures, open A texture in 2D editor like Photoshop, place B texture on it and see if it fits. Well, most likely it won't, so you will need to cut B texture into multiple parts and place them on old texture in way it will fit and look good. Then just save your new version of A texture, convert it to BLP and place it into your MPQ into correct folder. This way has one issue. If your object A shares texture with other objects, they will get retextured as well. That may be actually a good thing, but it also may be unpleasant, in some cases. If you want to avoid this, export whole A object's M2, open it in 010 editor and change texture's path there to something custom what doesn't exist (yet). Instead of making a new version of A texture, just save it as your new custom texture and you are again done. This may get more complicated if you end up having object A which has just so terrible UV map that you want to remake it. In such case, export it to OBJ and edit it as you desire, then port it to M2 and overwrite old file. But you wouldn't ask question like this here in case you could do this, so it wasn't probably really worth mentioning anyway.
-
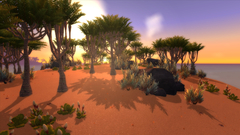
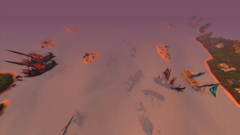
From the album: Yarr isles
I was really unsure wheter and how should I use different terrain textures in places like this. In the end, I've decided to just leave terrain as it is, at least for now. -
First of all, why the heck do I even bother with something what seems to be so basic? Well, apparently it is not, because there are a few tips and tricks which aren't very commonly known, at least beginners don't know them and there's no tutorial really describing them. I will also link my simple WIP tool which can be very usefull for you here. I will start with things you probably do already know, if that bothers you, just skip to the last heading. First of all, how can we get models into our map in Noggit? A short list of possibilities: Ctrl+c and ctrl+v. No magic hidden here. Import from MV. Import from a text file (Import.txt). Import from MV MV is a model viewer. WoW Model Viewer is an application which enables you to browse WoW models. Great thing, but here comes a problem - current Noggit's import functions aren't compatible with quite a lot of WMV's versions. As far as I know, importing WMOs in general tends to work. In order to import models from WMV, simply change ImportPath in noggit.conf, so it points to log.txt file in userSettings folder in your WMV's folder. An example follows.: ImportFile = D:\Modding\Projekty\Arathor\WMV\userSettings\log.txt When you have this set, you can simply open a WMV, select a model, then go to Noggit and shift+c to import M2, alt+c to import WMO. There were slightly bugged versions of Noggit where both shortcuts actually imported M2, keep this on mind please. The newest version should have this fixed by now. If your import functions don't work (mostly M2 tends to not), you can try a different version of WMV. Version which is definitely compatible with Noggit's import function for M2s can be downloaded on Modcraft.: http://modcraft.superparanoid.de/viewtopic.php?f=48&t=4797 The problem is, that this version is really an ancient one, and tends to crash frequently, especially when it comes to retro-ported stuff. Import from text file Import.txt is a file located in Noggit's installation folder. It contains paths to models separeted by line breaks. You can delete models from here simply by opening a file and deleting them. To reload a file, just deselect any model you may have selected in Noggit and go to Assist menu, choose To Text File function, and here you go, Import file is reloaded. If you have any model selected while clicking on To Text File button, its path will be written at the end of the file. This can be very useful when you need to copy a model from different map, or when you need to copy multiple models. To acces list of models in your Import.txt, simply go to Assist menu and click on From Text File. Then you can just start clicking on model names and models will appear on your mouse cursor or in model you have currently selected, or on selected coordinates, if Auto select mode in Edit menu is turned off (does anyone even use this thing?). So, why this tutorial? Where are those secret tips? Yep, its a little bit strange to write them at the end of tutorial which was supposed to be dedicated to this, but I needed to explain stuff above. Import.txt is actually quite a powerful thing to use, as long as you can get list of models you want to import into Noggit, separated by line breaks, and filter them. Such lists do exist in WoW - they are called listfiles. In each MPQ, you can find (listfile) (as long as it wasn't made as listfile-free MPQ). (listfile) is a list of all file paths to all files in MPQ. And we will make a good use of this. First of all, download my Toolkit. Its a WIP application and poorly written, I've got to admit, but it works for what we are going to do with it absolutely fine. There's also a simple .bat included.: https://www.dropbox.com/s/hh8i859hb9ebxve/AmarothsToolkit.rar?dl=0 Open your WMV. Go to File menu and select Export textures... option. In new panel which appears, make sure that Path preserved option is checked. Then just browse M2s. Everytime you find some you want to use, just click on Export all button in panel which have appeared. In the end, you will have model files in Export folder in WMV's directory, and they will be all in paths into which they belong. Now, you have basically two options. You can either place cleanup.bat script into Export folder and run it. It will delete all .skin and .blp files in all directories in Export folder. If you want to change list of extensions which should be deleted, simply right-click that cleanup.bat, click on Edit and you surely will figure out how to change it on your own. Then create a new, empty MPQ and place all folders in Export directory into it. The second option is skipping whole cleanup.bat part and continuing to another paragraph of this tutorial. When you have any sort of MPQ with (listfile) which contains files you don't want to use in Import.txt (like BLPs, SKINs or maybe even more stuff, it may be your server's patch you are giving to players or whatever else), you need to clean that (listfile) from all things you don't want to have there. To do this, just extract (listfile) from that MPQ and place it whenever you like. Then run my Toolkit application and set extracted (listfile) as input file. For this purpouse, you will want to use cleanup filter, which is that big panel on the left. Select extensions you want to keep in listfile (most likely .M2 and Root-only .WMO). You can also select path prefixes to keep only models from certain directory, for example, you can keep only files from World folders. You can also modify filters by using those 2 buttons and text input under filters, so you can add filter to World\Expansion02\ directory, for example. For more info, follow a Manual. When all your settings are done, just click on Cleanup Listfile button and save cleaned listfile whenever you want. If you have made a MPQ which already contains only M2 files, its (listfile) will, obviously, contain also only M2s (and (listfile) and (attributes) most likely), so you can basically use that (listfile)'s content without even filtering it by my Toolkit. Now just open that cleaned and filtered listfile, press ctrl+a (or select just some particular models you wanted to use), ctrl+c, open Import.txt, ctrl+v, ctrl+s, use To Text File function in Noggit to reload import file and you are done, you have your models in Noggit. This all can seem a little bit complicated, but when you learn how to do this and won't need to look any manual up for that, you will actually be able to quickly get lists of even hundreds or thousands file paths and filter them by using my Toolbox to get files you wanted, the only problem is exporting model files via WMV, if you need to do that (so, if you need to select just a few certain models rather then just use whole folder for example). One final tip. You can also create a (listfile) of all file paths in WoW and then just always get only models from some certain directories by using my Toolbox. Lets say you want all World\Expansion02\Coldarra\ models. If you already have prepared merged (listfile) of all WoW files, my Toolkit is actually very fast and easy way of getting all those models directly into Import.txt. Just open Toolkit, choose merged (listfile) as an input file, write World\Expansion02\Coldarra\ under filters, click on Add path prefix button, make that filter checked, click on Cleanup Listfile and... done. And one now really final tip. Extensions filter may be actually used also for ends of file names (like keg.m2, instead of just .m2). Path prefix filter can, on the other hand, be also used for name prefixes, like World/Custom/am_. Sadly, its (for now) limited for use on only one directory. This will get all am_ files, but only in World/Custom/ folder. Both extension and prefix filters aren't case-sensitive.
-
A pair of side notes.: 1. In order to get listfile containing only M2 paths, you can take one shortcut which is faster than my cleaner in my toolkit. Go to your WMV's Export folder, open a notepad and copy following: del /s /q *.blp del /s /q *.skin and save file as .bat file into Export folder. Then create a new, empty MPQ file and move it to that Export folder as well. Now, every single time you want to get some models into Noggit's Import file, export all those models from WVM like you normally would, but instead of using my cleaner just run .bat file. It will delete all blps and skins from Export directories (and following subdirectories) and thus leave only M2s, at least as long as you don't have any other garbage there. Then just place all remaining stuff into MPQ, export its lisfile and open it in Notepad. And you are done, because now you can just copy all M2 paths. So, basically, you need to use my toolkit only when you want to filter models or stuff like that. 2. the newest beta release of Noggit (and following ones) support WMV versions which place "," symbol directly behind file extension, which means that they are now compatible with most of WMV versions (at least with those WotLK ones).
-
Done. 2 45°s, 2 90°s, 3 straight and one separator. Feel free to use that and don't worry, it took just a few minutes to make this, its no big deal. patch-c.mpq
-
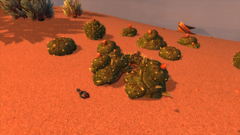
From the album: Yarr isles
Sit him down on a cactus throne, sit him down on a cactus throne, sit him down on a cactus throne, early in the morning! -
From the album: Yarr isles
More changes are planned here, this is more or less just a WIP version. -
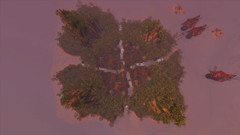
From the album: Yarr isles
Its actually quite a big place, as you can see.